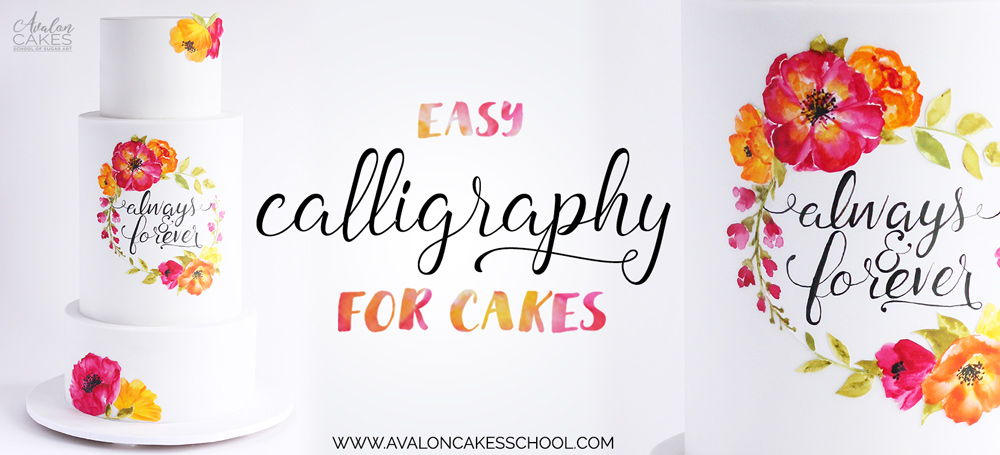
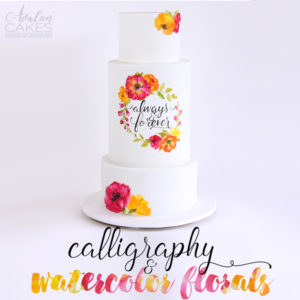
Calligraphy is one of those timeless beauties that I don't think will ever go out of style, however right now it's more IN then it's ever been (at least in this century ;). However, it takes a ton of practice to achieve true calligraphy, so I put together a little cheaters calligraphy tutorial for you. This is for those of us who need to produce calligraphy for our clients however don't have time to master the art! However.. gotta say, if I could clone myself, one of my clones would be studying to become a calligraphy badass. 😉 Also keep in mind you can use these techniques for ANY font, not just calligraphy! So here is an easy calligraphy for cakes tutorial...
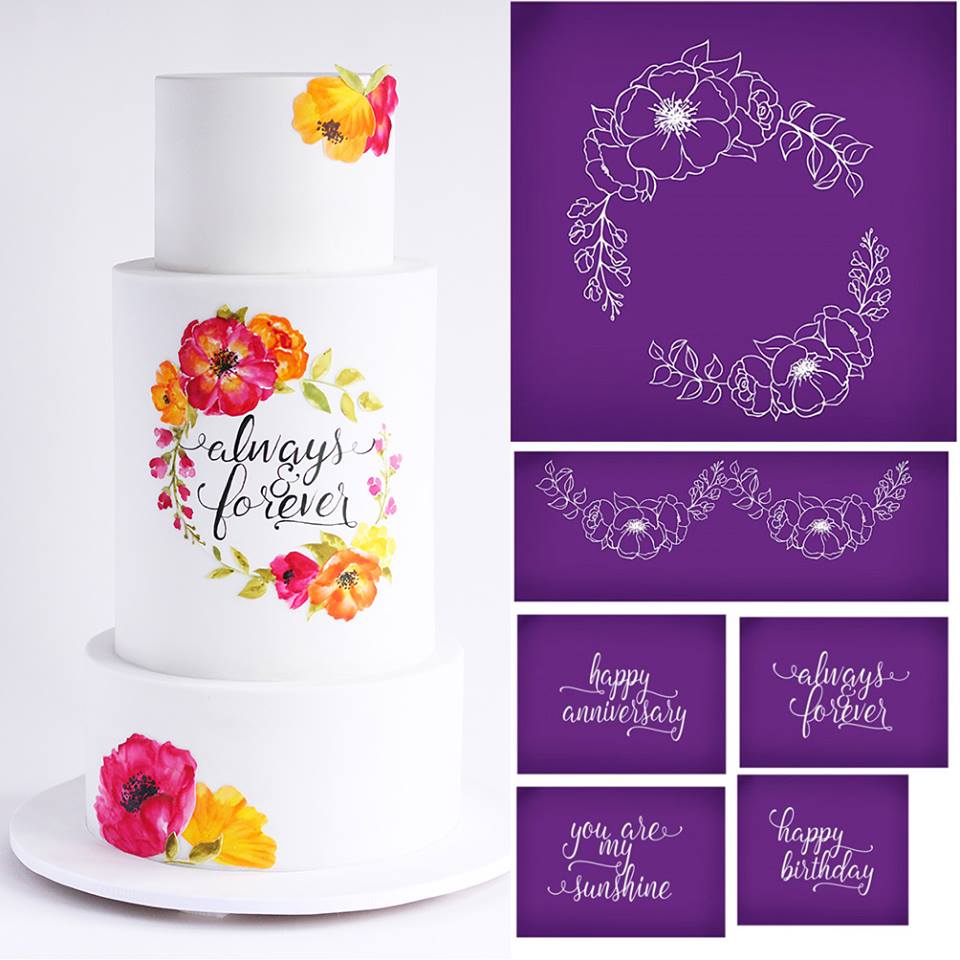
Evil Cake Genius and myself came together to make this even easier! FULL set of mesh (yes, mesh!) stencils that can be used for so many cakes! The calligraphy AND the floral wreath outlines! Imagine the possibilities. #MakeYourLifeEasier
Want a set of your own? Get them here >>> Avalon Cakes Stencil Collection
Here is a quick Facebook Live going over how I did my "cheaters" calligraphy for cakes...
Want to see more facebook lives from me? Be sure to follow Avalon Cakes on Facebook!
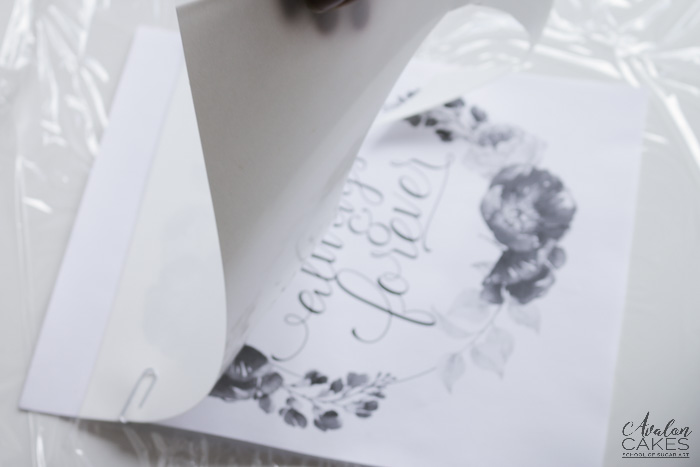
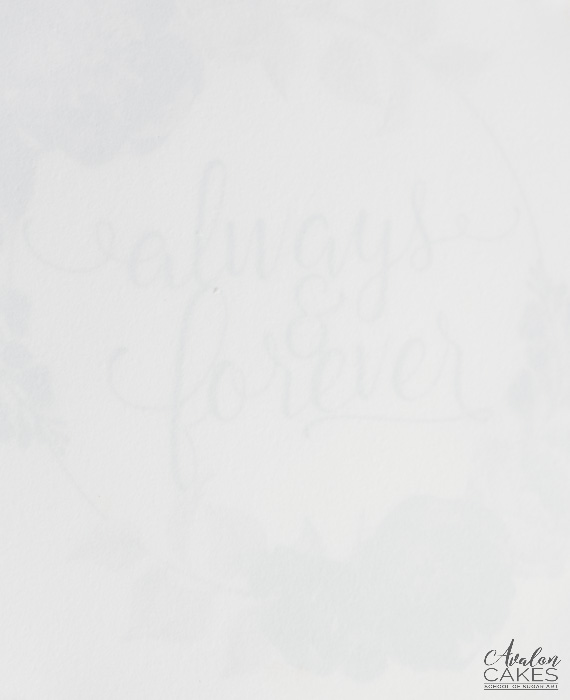
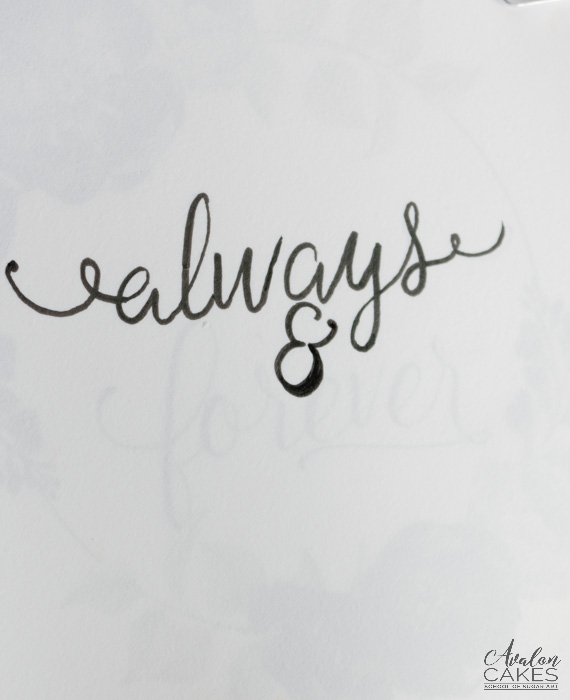
For this particular cake I'm painting my calligraphy onto an Icing Image sheet. Now you don't have to use an icing image sheet, you can also paint it directly on your cake. You might just want to use a transfer method like the pencil transfer method or a projector. However the Icing Image worked great for the design I was doing. So, for me, it was less of a commitment to write it on an icing image sheet and have that flexibility to not use it if I screwed it up! When painting directly on a cake it can be quite the commitment, and it's not always so easy to clean off black food color from your cake. Geee, my heart drops just thinking about having to re-cover a cake! You can also do this on a fondant plaque.
For this technique I used:
So I painted my calligraphy first and the cut out a perfect circle using one of my favorite tools, Martha's Circle Cutter (I use it way more than I thought I would!). I then attached it to my cake with a little bit of shortening. Why shortening? Because it allows me to move it around! I can't tell you how many times I've put something in the wrong place or needed to move something and I couldn't because I used piping gel or water. And no, shortening will not soak through the icing image and leave oil marks. It will however leave marks on the front of the icing image sheet, so be careful when handling it.
Last modified on January 27th, 2023


I'm Avalon -- and I'm not your typical cake decorator. I'm obsessed with fusing the world of ART and CAKE. Sugar is my canvas. If you're down to get messy and dive into a whole new level of cake, take my virtual hand, cause I've got so many secrets I want to show you! learn more>>

Join 1000s of others in our Online Cake School and learn how to make incredible sugar art!


