Glitter.... that you CAN EAT and MAKE yourself?
Yep, the original gelatin home-made edible glitter recipe!
That's right, learn how to make homemade edible glitter. Not pulling your leg! And, to top it off, it's EASY peasy! Now, now, pick your jaw up off that floor... chin rug burns are not attractive 😉
Ah, the holidays, where trails of glitter lead you to magical eye candy utopia! When it's not being used on every ornament, tree and mantle, it's the sparkle in every little (and big) girl's eye. There is something extremely nostalgic about glitter and yet applied in the right way, very sophisticated and chic. Those little sparkles catch the corner of your eye every time, face it, you love GLITTER.
Sure, you can buy glitter for your cakes...or wait....can you? That is the question most of the time, isn't it? It can be very confusing. Disco dust (non-toxic, but NOT edible) commonly sold alongside edible products, should not be used on food that will be consumed. It's more for those items that are showpieces only. It's essentially non-toxic craft glitter... it won't hurt you if you eat it, (so they say) but never gets digested. By the way, ever wonder how much glitter you inhale? Bits of plastic in my lungs... meh, I'm good, no use for glittery lungs.
This tutorial will show how to create your own out of gelatin! Now, I'm not saying you're going to want to eat spoon fulls of glitter (unless you always go around eating pure gelatin).. but you can feel secure in sprinkling some on a cupcake or putting it a cake without feeling like you've contaminated a cake with plastic, I mean, disco dust.
So, here is the alternative to all that confusing non-sense! YOU know what goes into it and you get to customize it to your liking! AND it's....3 ingredients!
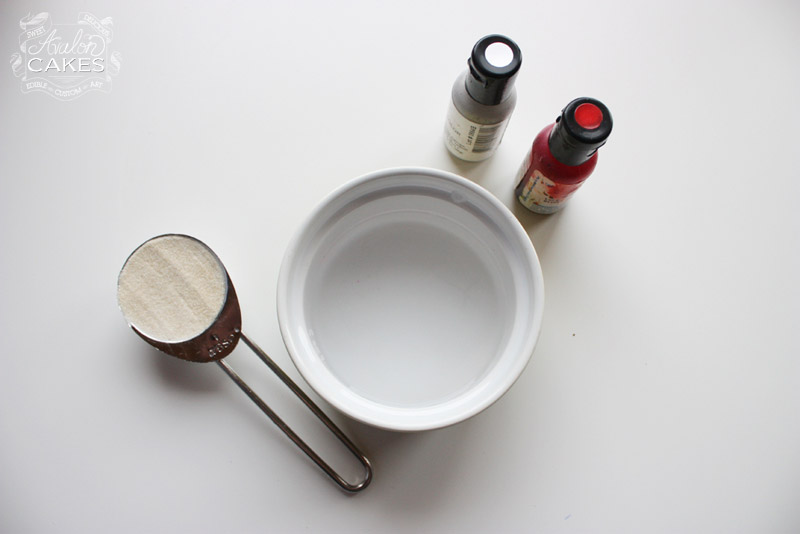
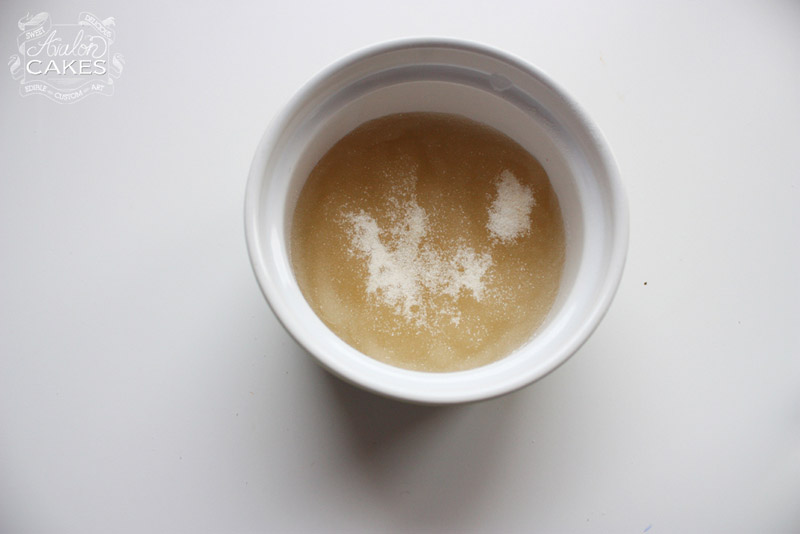
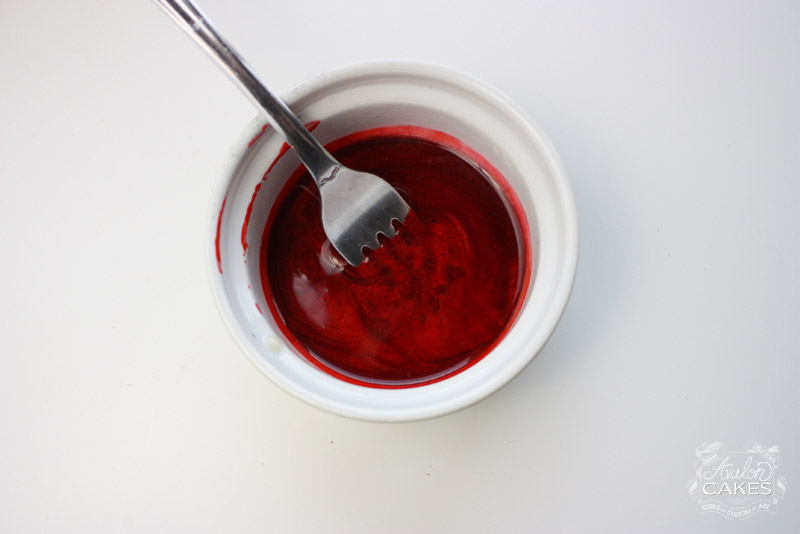
SLOWLY (*important*) sprinkle gelatin EVENLY over water. A wide-mouth bowl is best, allowing more surface contact for the gelatin to dissolve properly. Do NOT mix.
If you just pour the gelatin in, you will most likely have very large chunks of gelatin that will not melt down. Take your time and do it right.

Place in the microwave and heat in 10 second increments (very important) for about a total of 20-30 seconds.
Gelatin heats VERY quickly AND when gelatin starts to boil, it breaks down the proteins, which essentially means your gelatin will no longer serve it's purpose.
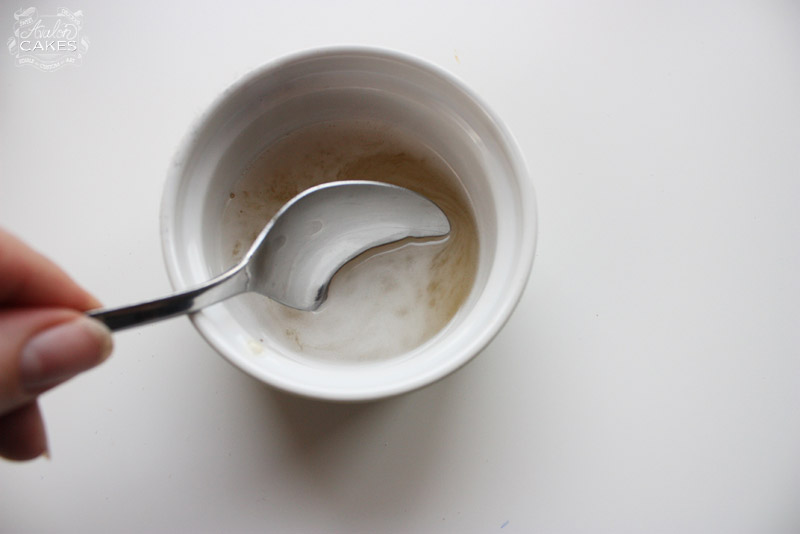
There will be some white foam that gathers on the top, just skim it off with a spoon.

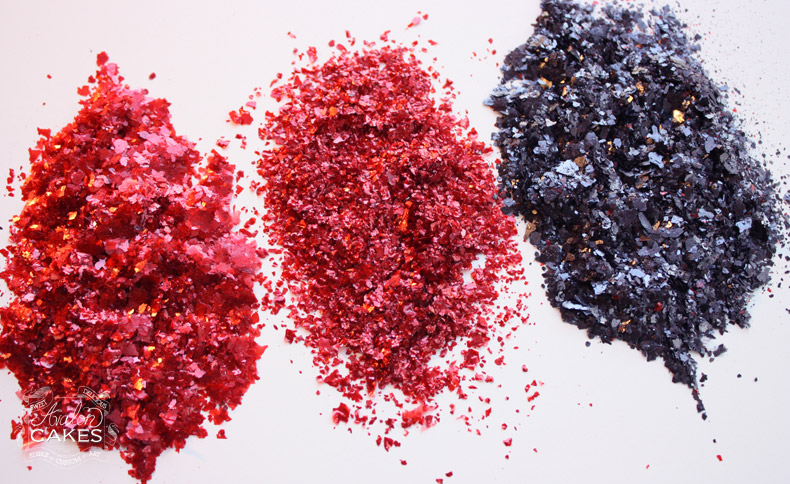
Mix in your desired color and shade! (I did red and silver airbrush, owwww, ahhhhhh)
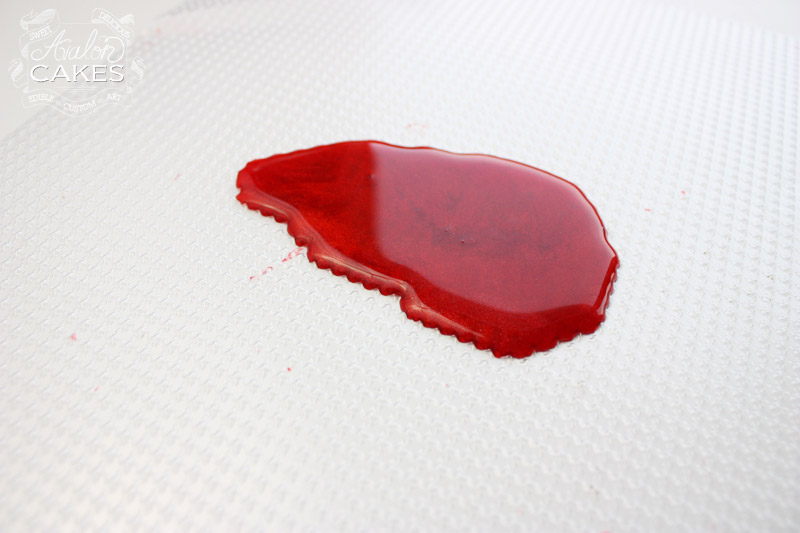
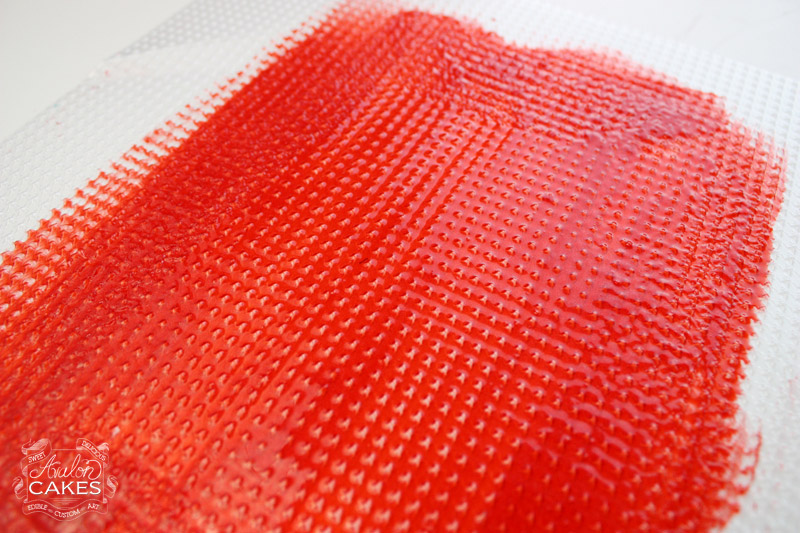
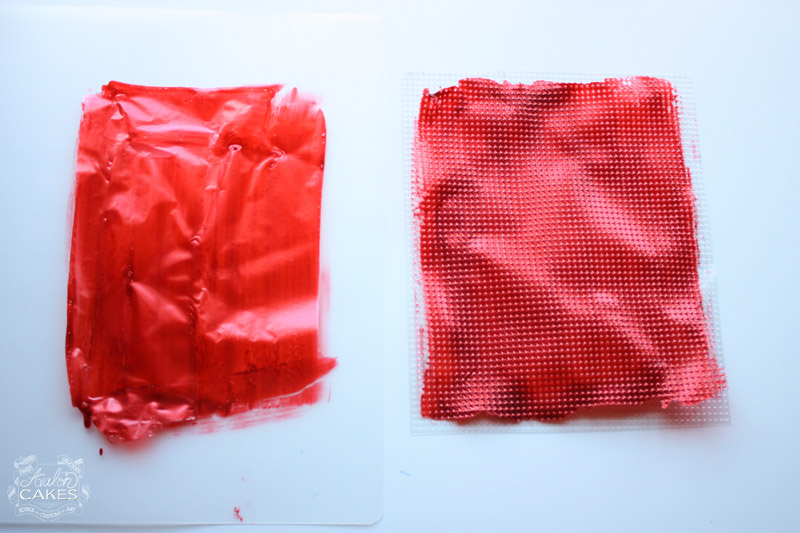
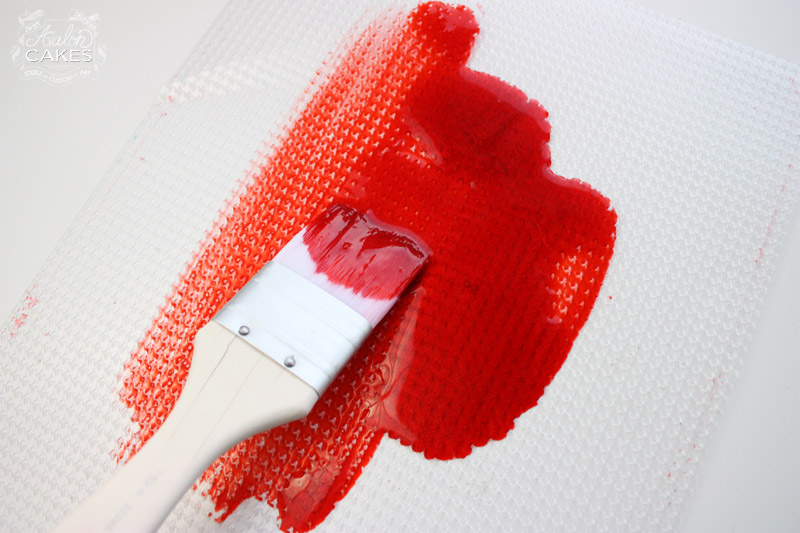
Pour gelatin onto surface of choice (cutting mat or texture sheets). The two surfaces come out with different results. The cutting mat has no texture, thus creating an airy, flaky glitter. While the texture sheet creates curves that can allow for a more reflective glitter. Either way, beautiful results.

You want to paint the gelatin with a larger brush, thin (but not TOO thin). It DOESN'T need to look perfect, it's just going to be ground up anyhow... so put your perfectionist self away for this one! You can also use a small cake spatula to spread if you'd like.
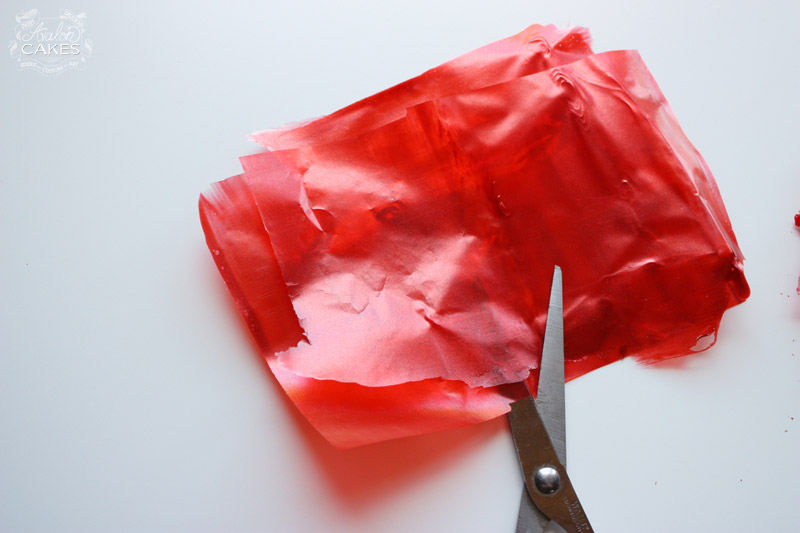
Now... the hard part..... let it sit for 6-10 hours (depending on humidity). You can put a fan on them to speed up this process.
You'll know they are ready when they have released from the surface and are dry to the touch. Like I said, not perfect... but who has time for perfect when there is glitter to be made?

Cut the gelatin sheets down into smaller pieces.
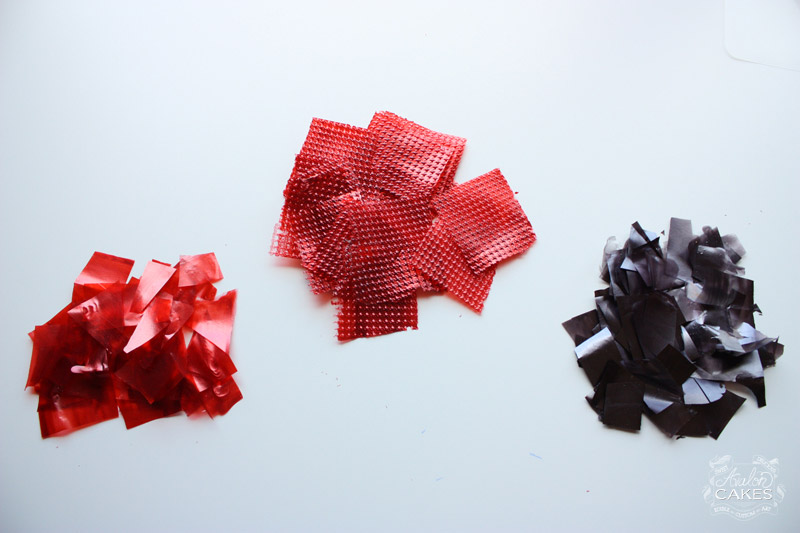
Mmmm pretty, organized piles. *swoon*
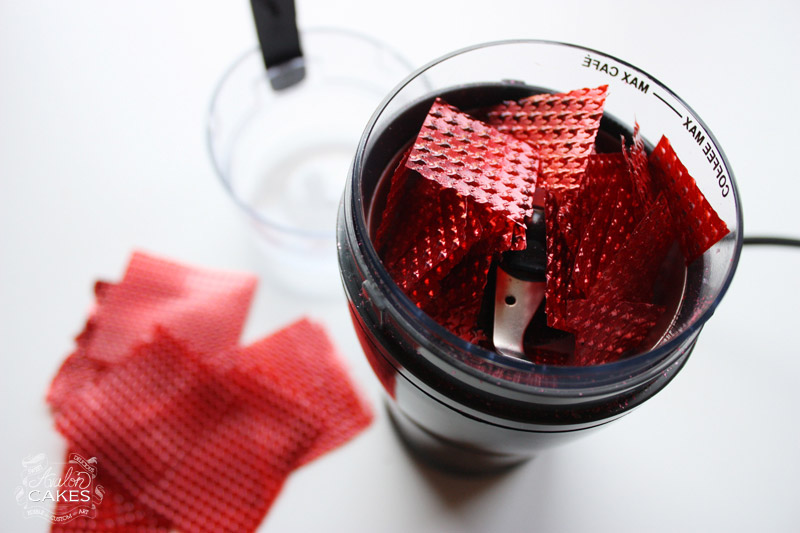
Alright, time to stuff that gelatin in the grinder and make magic happen!
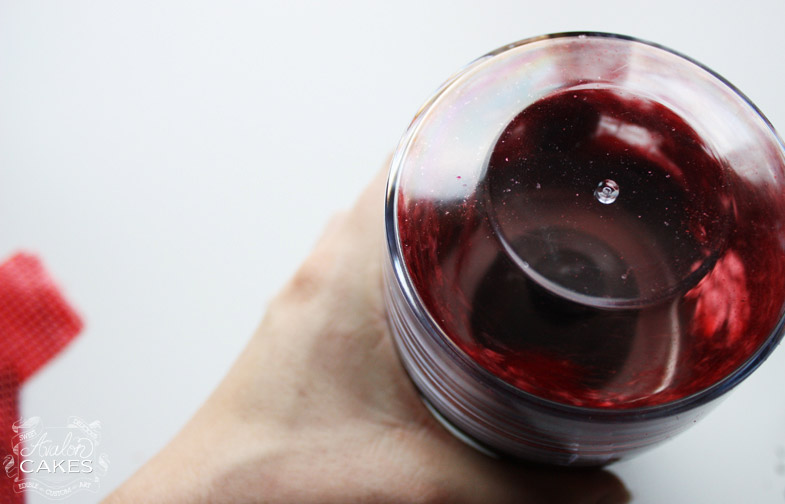
As we know, glitter has that oh-so-true reputation of being, well, messy. This case is no exception. So be prepared to get glitter... here and there, probably everywhere! Don't say I didn't warn ya! Totally worth it. It will in no way harm you, but might irritate your sinuses. A simple dust mask or handkerchief does the trick.
Tip: gelatin melts with contact with water, so try to collect with a dry cloth first.
Because the gelatin is so light, I found it best to grind in small bursts to allow the gelatin to come back down to the blade. At this point, you can grind it as coarse or as fine as you like.
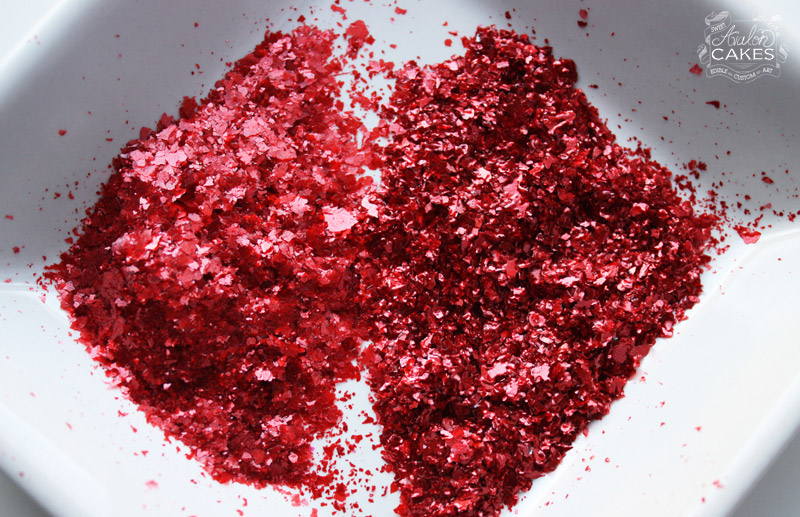
TA DA!!! The pile on the left is the gelatin from the cutting mat surface and the right is the textured surface. Dorthy would be SO proud of this pile of ruby red, don't you think?
Pardon me, I now must skip around and sprinkle glitter on EVERYTHING...
Hope you found this as helpful as I found it fun... now go adore everything with GLITTER!
Added tip from Kara Andretta, use a sifter to separate the smaller flakes and larger flakes! This way, you can have a much finer, consistent glitter! Then put those larger chunks in and re-grind. Or use them for something else!
She also came up with a version of gelatin glitter (using gelatin leaf!) if you want to check out her tutorial >> http://www.karascouturecakes.com/edible-gelatin-glitter/


Last modified on January 19th, 2023


I'm Avalon -- and I'm not your typical cake decorator. I'm obsessed with fusing the world of ART and CAKE. Sugar is my canvas. If you're down to get messy and dive into a whole new level of cake, take my virtual hand, cause I've got so many secrets I want to show you! learn more>>

Join 1000s of others in our Online Cake School and learn how to make incredible sugar art!


