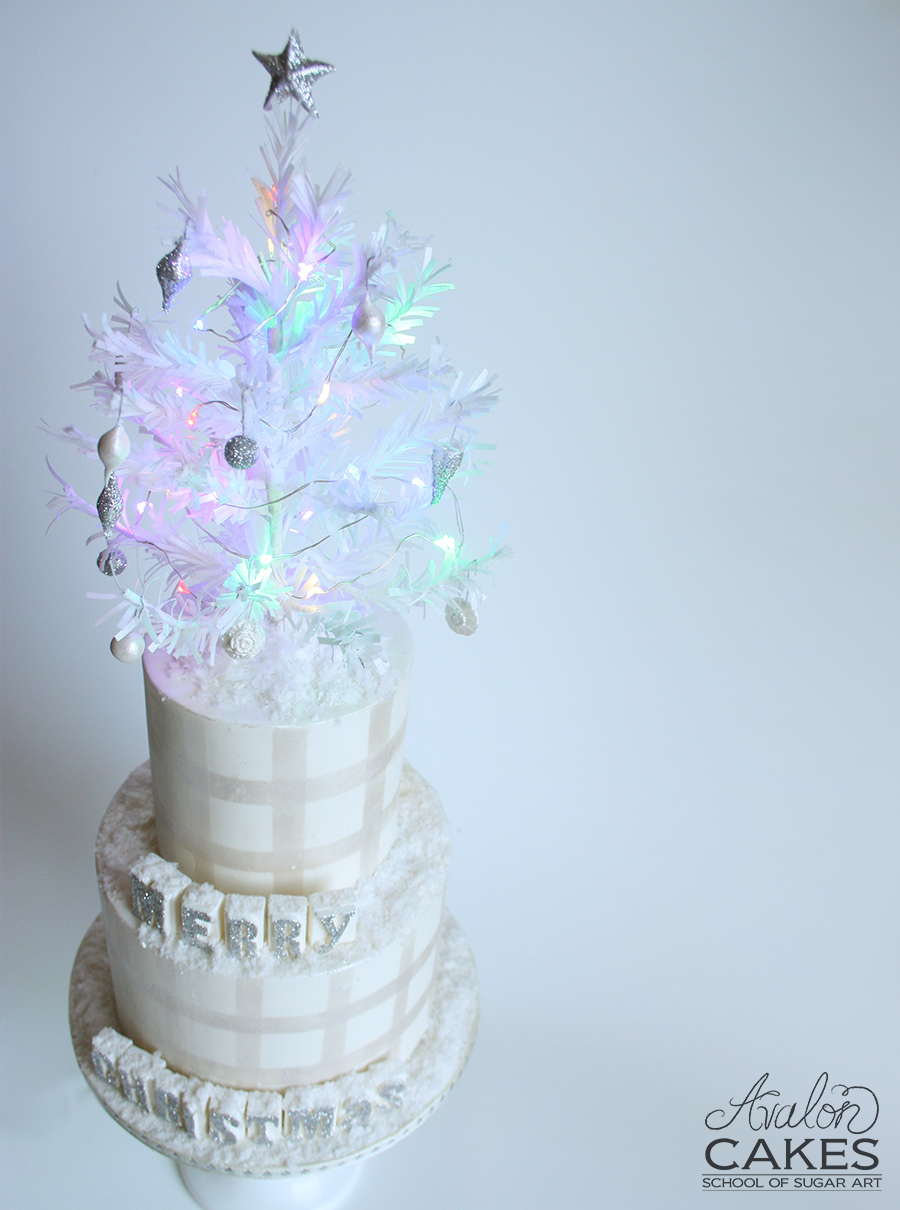
And, in the evening, turn the lights on for an extra special nostalgic feeling!
I created this cake for the marvelous McGreevy Cakes Blog. So honored to be a part of it this year! Be sure to go check out the rest of the cakes when you get a chance!
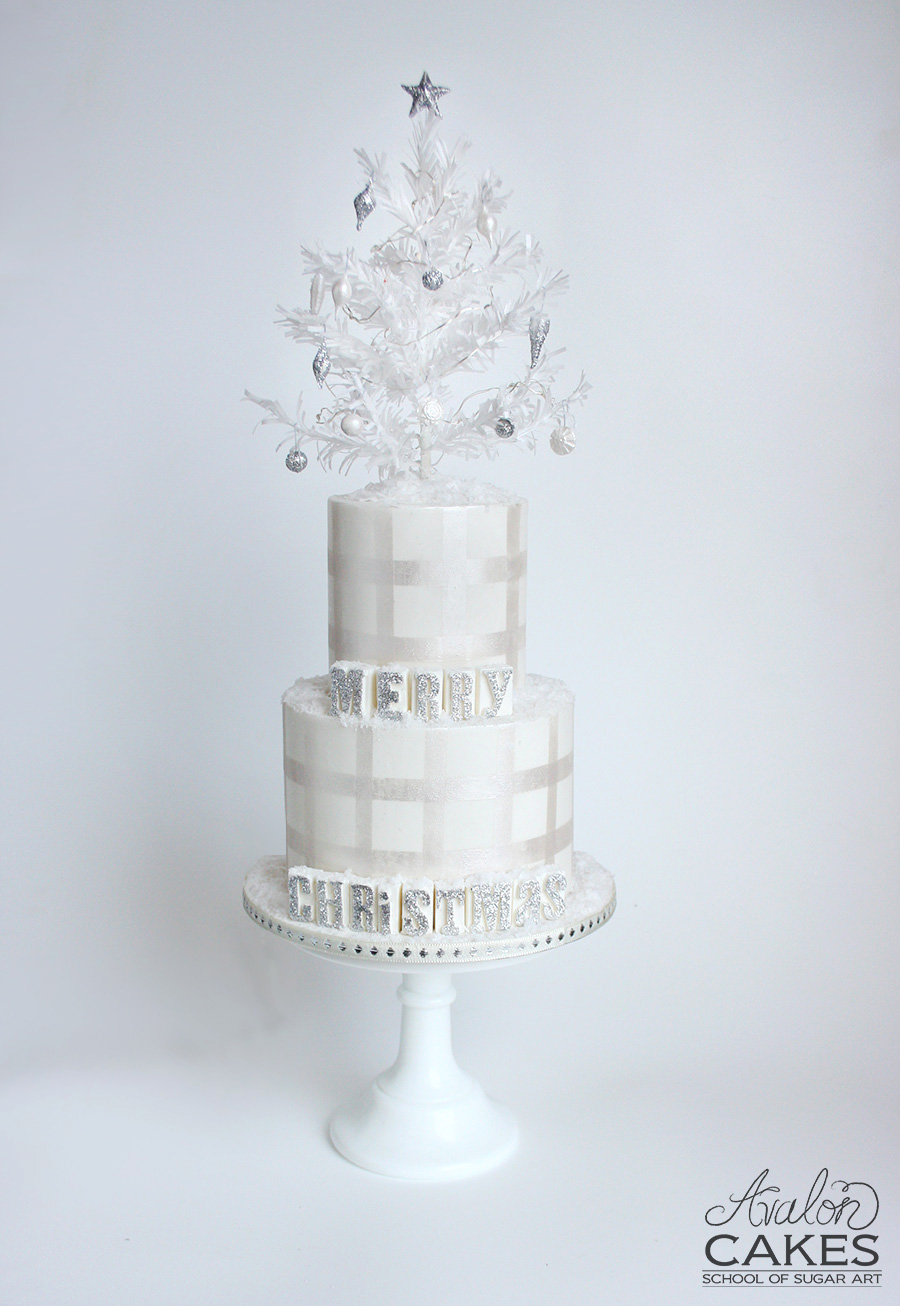
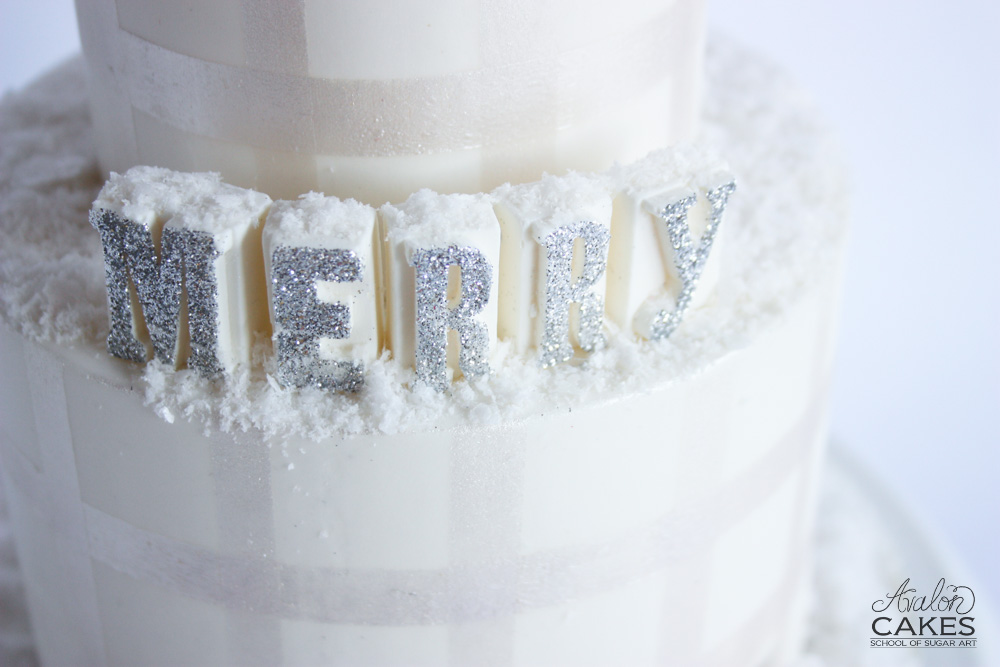
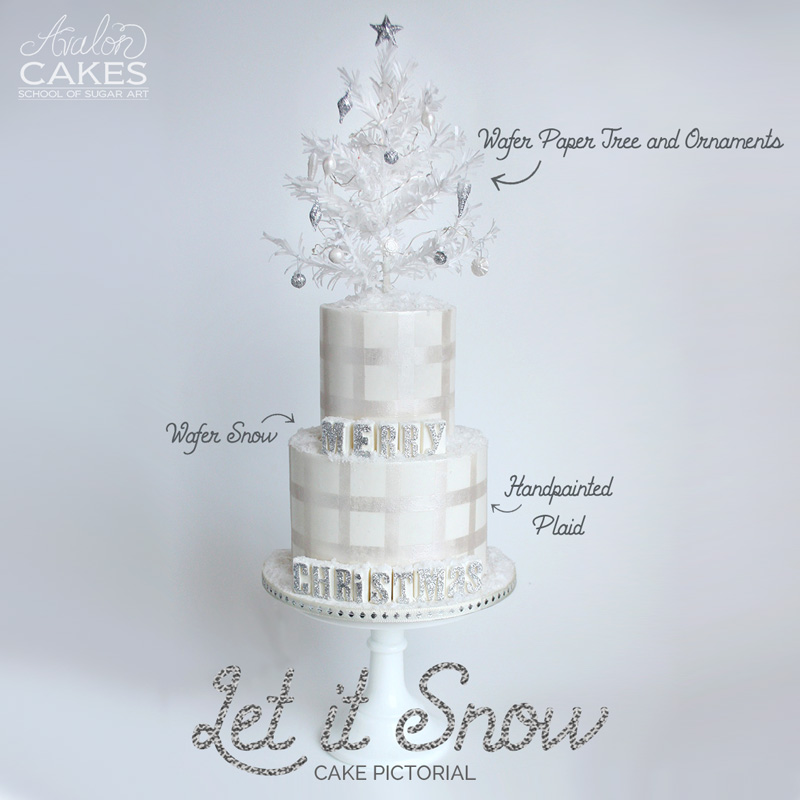
We all based our cakes on Christmas songs. I chose the song "Let it Snow". Without a doubt, a classic! Where I live, it snows just about 7 months out of the year. It's cold and frigid, yes, but the beauty is awe-inspiring and I couldn't help but to try to re-create a bit of that winter wonderland in cake. I wanted white, pearl and silver. So I took the romantic nature of the song along with SNOW, of course, and designed little cake.
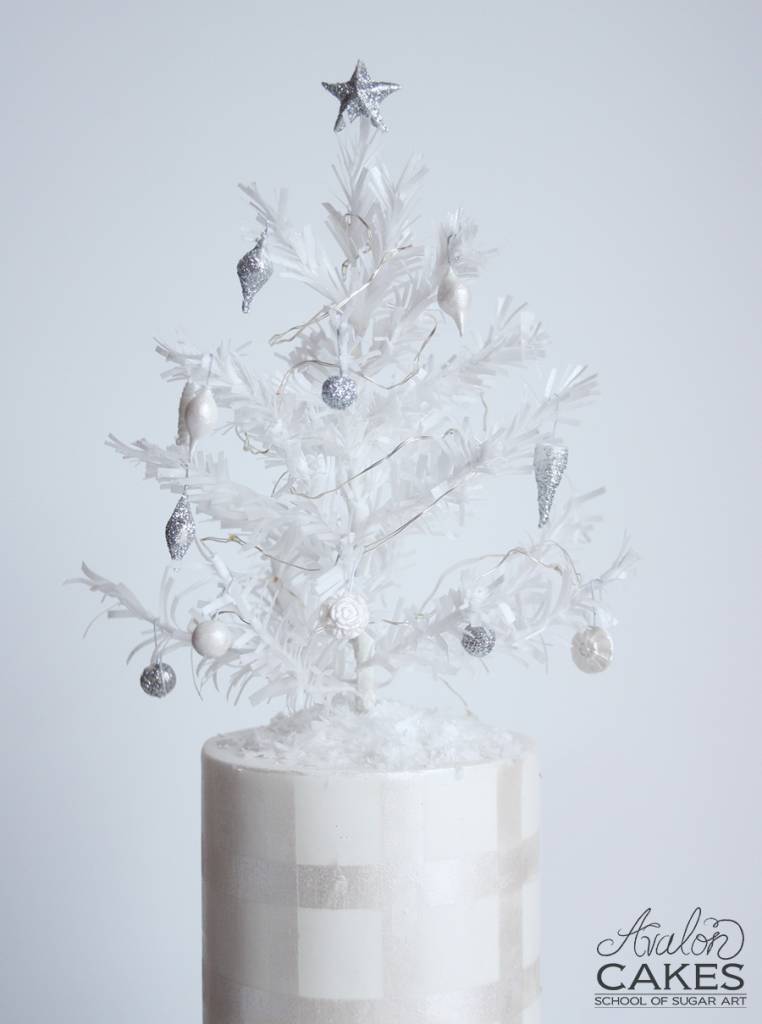
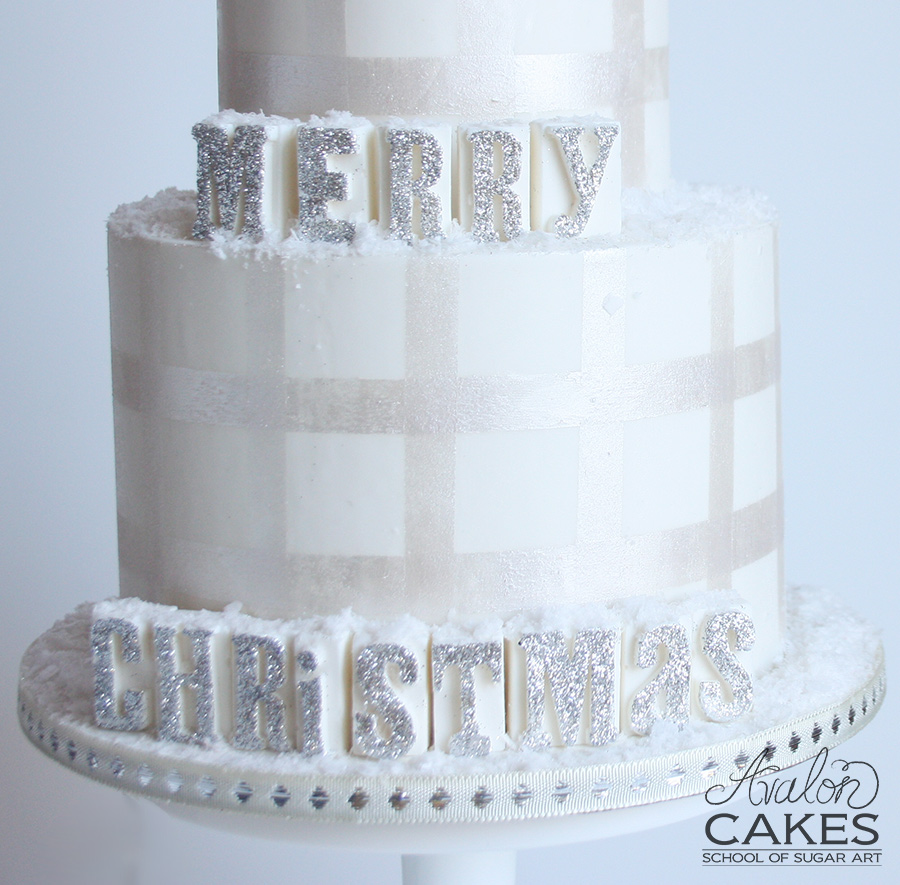
The tree is made of wafer paper adorned with fondant and wafer ornaments. The tiers are handpainted with plaid (no printers here). Everything is covered in a layer of wafer paper snow. And here is a peak into how I created the letters:
When I found these little letter blocks in the scrapbook section, I snapped them from the shelf, held them tight and whispered "I'm gonna mold you". Mmmhmmmm... kinda creeper style, but they had a very important new purpose to their little lives. They were going to adorn many cakes to come! Letters... oh letters, words, words, letters.. they are such a... afterthought. They are usually the last thing we put on the cake, and dangit, we are TIRED. So I have found these to be one of those easy and impactful solutions. They can even kind of be one of the main focal points, instead of just another piped afterthought!
Now you can dress them up however you like. Use a little bit of paint on the surface or use different solid colors. I like to use candy melts with them because I find they accept the details the best, are easy to handle and quick! Fondant and modeling chocolate will also work of course!
This time around we are going to give them some GLITTER, baby. Cause it's Christmas, the one excuse to glitter EVERYTHING.
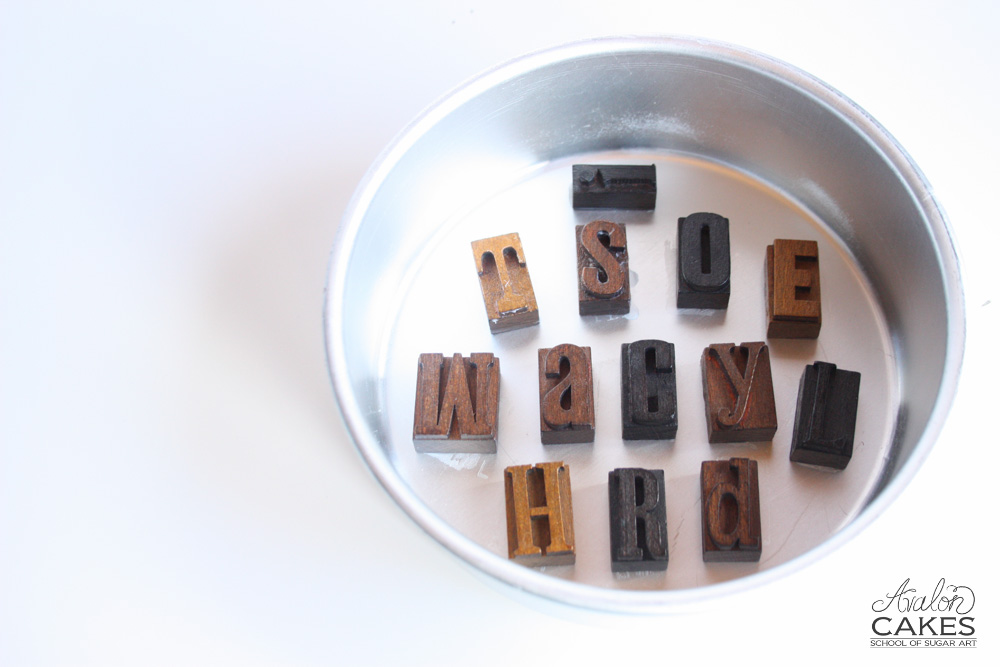
I am using these fun little letter blocks: Letter Press Print Blocks. (check out your local craft store first, scrapbook section, don't forget your coupons! ;))
On the back of each block paint a thin coating of shortening. This will help the blocks adhere to the bottom of the pan. You don't want those little blocks becoming floaters. Trrrust me, from experience, not a great way to spend an afternoon, peelin away mold material from every crevasse of these little guys.
Place blocks into a flat container with straight sides. In this case, a cake pan worked perfectly!
Make sure to give the blocks a bit of space between each other. Since these blocks have a bit of a porous surface, we are going to mist them with some canola oil (any food oil spray will work) to make them less prone to sticking.
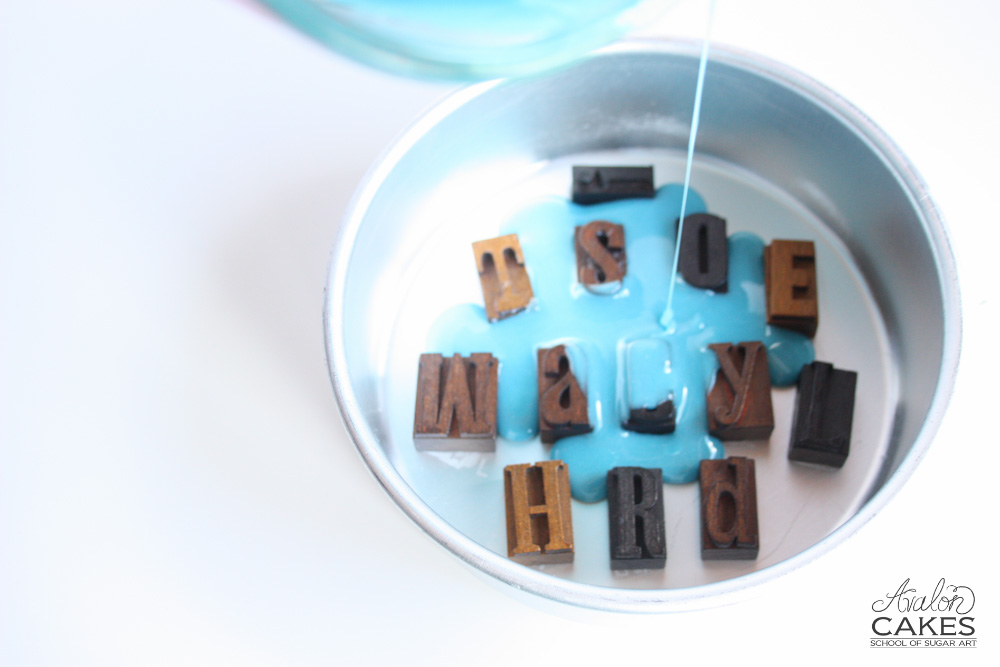
Using a pourable molding material works best for capturing the detail. I'm using my "Make it Yourself Mold Material" which is a super easy recipe made of ingredients that can be found in your local grocery store! Classic and Premium Members get access to the "Make it Yourself Mold Material" tutorial. It's great because if you screw up, you can just re-melt it and try again! Alternatively, you can use something like Composimold or any other food-safe silicone.
Be sure to pour into the middle of the letters first, to avoid air bubbles.
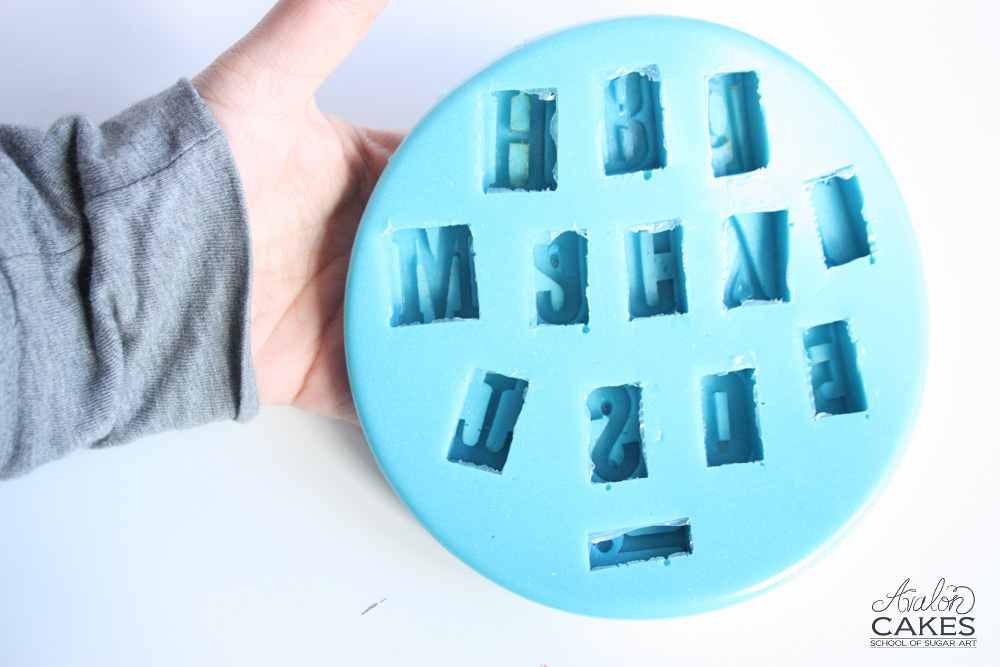
Place mold in the freezer for approx 10 minutes (or follow the instructions of your chosen mold material). When it's all set up, pop it out and slowly remove all the blocks. Ta-da, super awesome, one-of-a-kind mold to do all your dirty work!
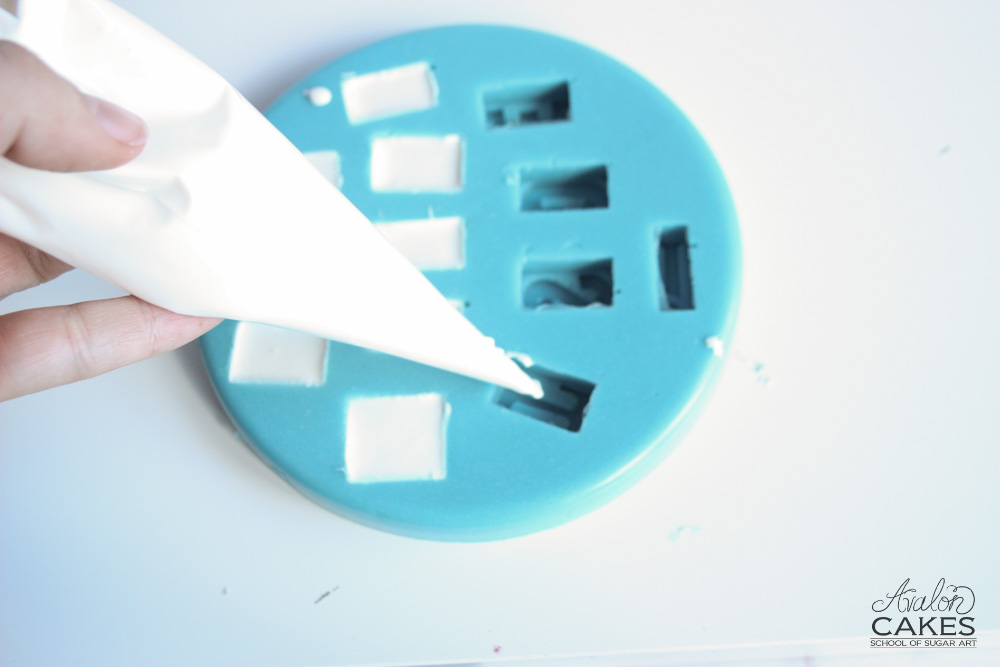
Melt some candy melts at 30 second increments in the microwave until smooth. They should be smooth but not hot to the touch (allow to cool a bit if it's too hot). Scoop into a pastry bag. Cut a small opening and start filling the blocks. Use the tip of your bag to get into all the deepest parts of the mold first and then fill the rest. Firmly hit the bottom of the mold to help the bubbles rise to the top. Freeze for approx 5 minutes.
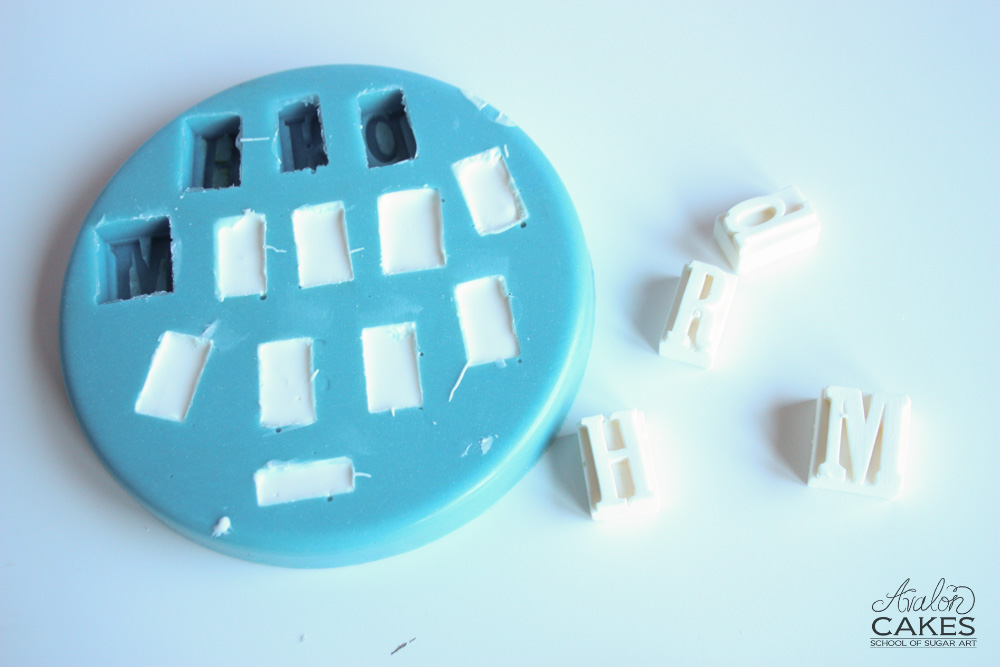
Pop those bad boys out and you've got some charming little letters!
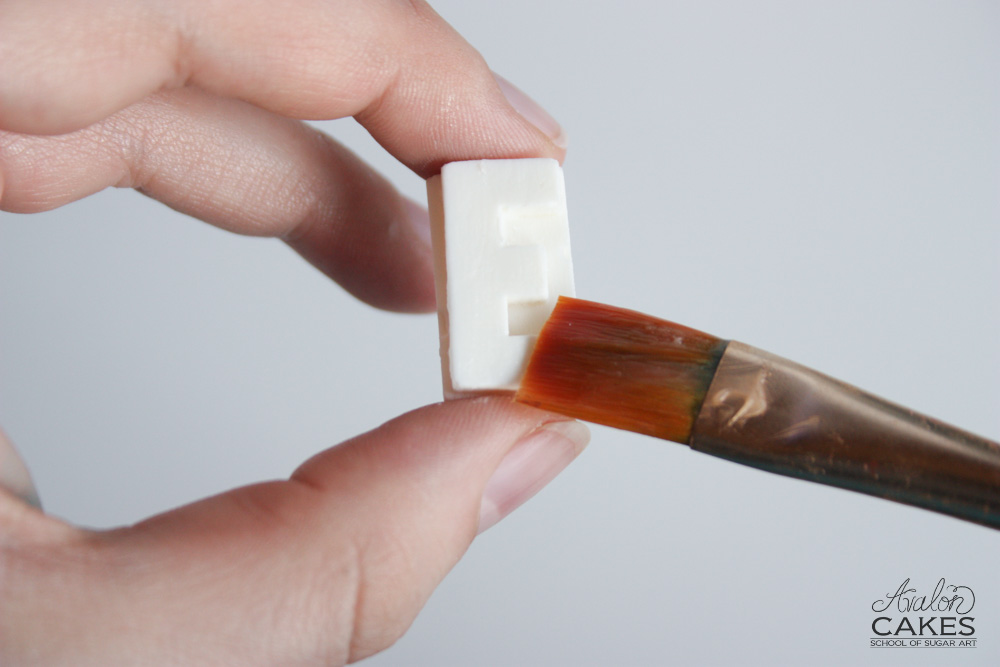
Coat only the surface of the letter with shortening. Flat brushes are your best friend for this job.
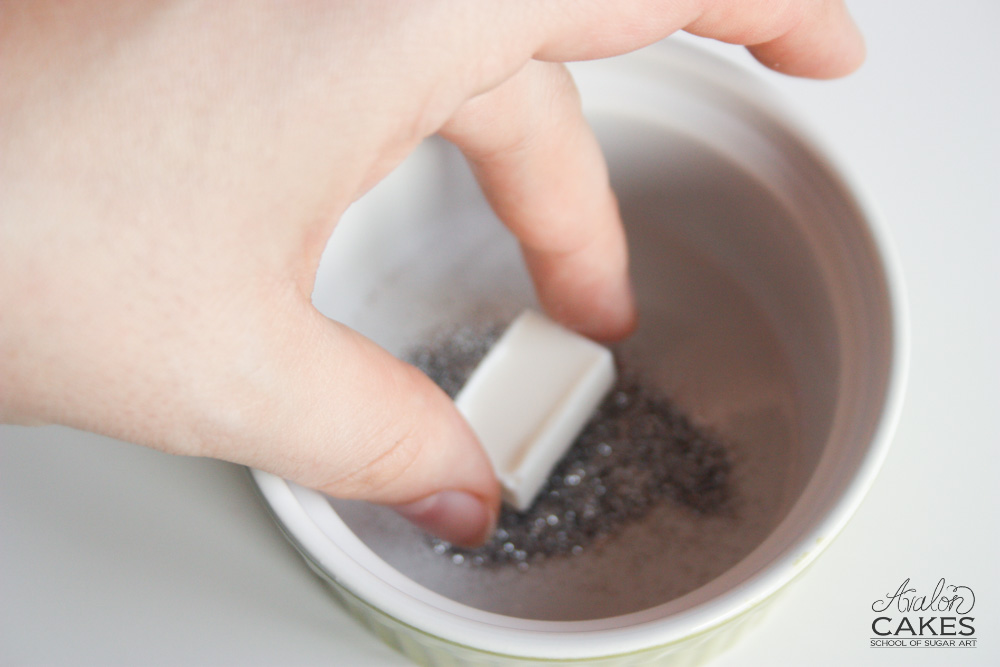
Fill a small flat dish with a shallow layer of glitter. Dip your letter face first in the glitter. Be sure to tap your hand to help shake off any excess glitter before lifting up and turning over.
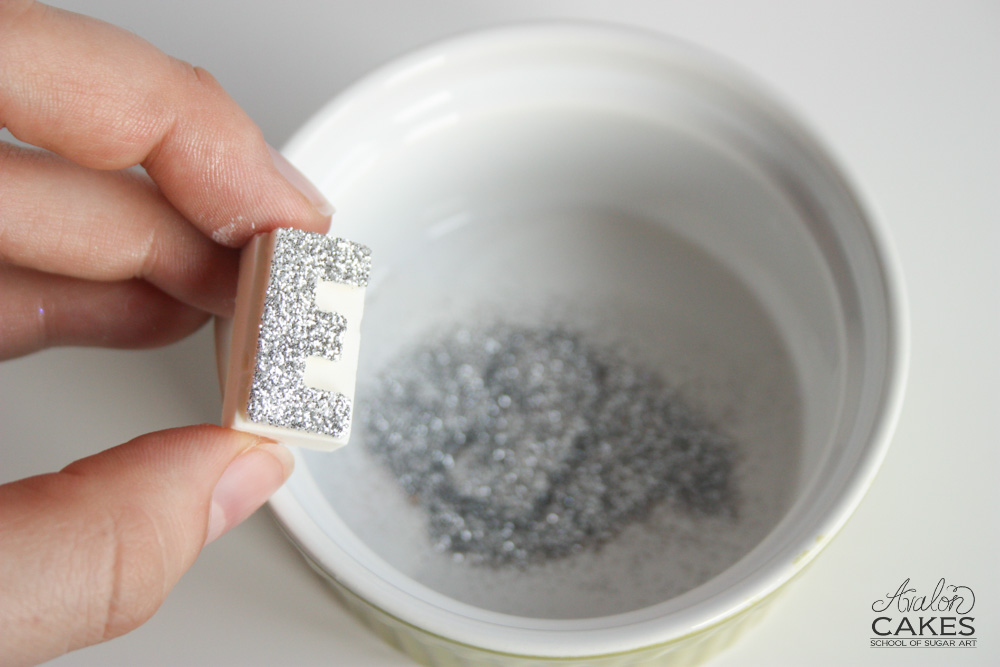
For this we are using disco dust, since the letters can easily be removed from the cake. However, want to make them fully edible? See my free edible glitter tutorial!
Tad-da! Glitzy glamorous easy Christmas Cake, here we come!
Tutorial includes:
- Wafer Paper Christmas Tree
-Mini Ornaments
-Handpainted (we've got tricks, yes we do!) pearl plaid
-Wafer Snow
Anndd you get access to all this and much more too (tutorials, calculators, recipes, articles!)!
Last modified on January 27th, 2023


I'm Avalon -- and I'm not your typical cake decorator. I'm obsessed with fusing the world of ART and CAKE. Sugar is my canvas. If you're down to get messy and dive into a whole new level of cake, take my virtual hand, cause I've got so many secrets I want to show you! learn more>>

Join 1000s of others in our Online Cake School and learn how to make incredible sugar art!


