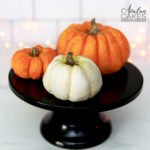
Super Easy Pumpkin Cake Hack
Create a realistic pumpkin in seconds with this super easy pumpkin cake HACK! Using buttercream or ganache, these pumpkin cakes will be your most beloved Hallowen or Thanksgiving tradition.
Yield: 1 pumpkin
Equipment
- Turn Table
- Scissors
- Small Spatula
- Flat Paintbrush
- Array of Paintbrushes
- Circle Cutters
Materials
- 1 each Cake or cupcake See notes above for sizes, recipe listed below
- 1 batch Buttercream or Ganache (orange or color of choice for the pumpkin) amounts depend on preference, recipe listed below
- 1/2 cup Butttercream or Ganache (brown or color of choice for the stem)
- 1-2 pieces Plastic Wrap You'll need more depending on the size of your pumpkin
- 1 roll Butcher or Bakers Twine
- 1 Cake Board
- 2 Disposable Pastry Bags
- 1 Coupler
- 1 Small open star tip (Wilton 32)
- 1 Large Round Tube Tip (Ateco 809 or similar) You dont NEED this tip, you can simply cut a larger hole in your bag .
- 1 Small Round Tip (#2 or #3)
- 1 piece Dried Spegetti
Painting (optional)
- 1 Yellow + Red to make Orange I used Portaleo PaintsI used this, but you can use anything fat-friendly, see video for suggestions
- 1 Green I used Portaleo PaintsI used this, but you can use anything fat-friendly, see video for suggestions
- 1 Yellow I used Portaleo PaintsI used this, but you can use anything fat-friendly, see video for suggestions
- 1 White I used Portaleo PaintsI used this, but you can use anything fat-friendly, see video for suggestions
- 1 Slow Dilution (or Vodka) I used Portaleo PaintsI used this, but you can use anything fat-friendly, see video for suggestions
Instructions
- Layout 6-8 butcher twine evenly spaced in a pie slice pattern. Place a cake board down on your cake turntable. Cut 6-8 twine (make sure they are long enough to go around your cake and then some) on your cake turntable in a pie slice pattern.1 roll Butcher or Bakers Twine, 1 Cake Board
- Layout plastic wrap over the top of the twine. Lay the plastic wrap over the top of the twine. You want to again make sure your pieces are long enough to wrap around your cake. For my 4" cake I needed two strips, for my cupcake pumpkins I only needed one. Try to keep the plastic as wrinkle-free as possible.1-2 pieces Plastic Wrap
- Pipe a "pancake" of icing from the center out. This should be a little larger than your cake circumference.1 batch Buttercream or Ganache (orange or color of choice for the pumpkin), 1 Large Round Tube Tip (Ateco 809 or similar), 2 Disposable Pastry Bags
- Ice your cake. This does not need to be perfect, just a nice base coat of icing around 1/3" thick.1 each Cake or cupcake
- Pull the plastic wrap up and around the cake, gathering at the top. Tie off with some twine. Try to keep the plastic wrap as smooth as possible to avoid an overabundance of wrinkles. Use your hands to shape and round out the shape.
- Take each string of twine and wrap it around the top, pull taut. This will make your pumpkin ridges. Do this for each string, making sure to take care in your placement.
- Place in the fridge or freezer until solid.
- Once solid, remove from fridge and unwrap. Be careful when unwrapping, as you don't want to pull any buttercream off the cake.
- Using a flat paintbrush and some fresh buttercream, fill and smooth any wrinkles left behind from the plastic wrap.
- Pipe your stem. Using your brown buttercream, attach a small star tip (I used the Wilton 32 tip) to your pastry bag. Place the tip over the top of the spaghetti, and while turning your turntable, pipe the stem. This will result in a twisted stem. Use a small round tip (#2or #3) to pipe the base and added texture.1 Coupler, 1 Small open star tip (Wilton 32), 1 Small Round Tip (#2 or #3), 1 piece Dried Spegetti
- (Optional) Paint for more dimension. To paint this cake, you'll want to make sure you're working with it right out of the fridge as you want it to be cold so your brush strokes don't ruin any of the texture. See video for painting tips.1 Yellow + Red to make Orange, 1 Green, 1 Yellow, 1 White, 1 Slow Dilution (or Vodka)
