Knowing how to create a successful tasting/consultation is one of the most important aspects of the cake business. It is your time to shine, show what you are made of and, well, sell that cake. I'm going to tell you my entire process with creating successful tastings from the moment that customer hits your email box to the moment they sign that contract. I am discussing this from a traveling tasting (meaning you have to travel to meet your client) perspective. Along with time saving tips and little added touches to make you stand out above the rest! Enough with the mumbo jumbo, let's begin!
We also have a guest contributor, Shannon Bond, who gives us an inside look at her process for Successful At-Home Tastings! Check out her article here.
I find it so easy to get caught up in a back and forth email correspondence with our customers. Small little emails. You play the waiting game, they play the waiting game. Two weeks later and 20 emails in, all that valuable time has been wasted or better yet, another cake designer has snatched them up! Try to minimize the back and forth and really focus on asking them all the questions you need UP FRONT. I suggest creating a general template that you copy & paste every time you receive an inquiry. Or you can go the route I went and create a form on your website for "Quote Requests" or "Cake Inquiries". I made it really hard for my customers to find my email address, so they truly had to fill out the form to get a quote. This also allowed me to state (before they even emailed me) how much my minimum dollar amount was on my services. This helped weed out anyone whose budget was below what my minimum was. I could also lay out any other terms I had, such as "Tastings are only for cakes serving 100 guests or more".
Email 1:
The questions I ask: Name, Date of Event, Event, Guest Count, Venue, How they found me and any current design ideas (not always fully formed yet). I, personally, never asked for their "budget". I find that most people don't really know how much a cake costs in general, half the time they are actually trying to get an idea of what they should be spending from YOU. This is our opportunity to educate them. Often, I will get a customer that is floored by my prices, this is my opportunity to kindly educate them on the amount of time, effort and supplies that go into their cake. I usually have a little "spiel" written out for such events, a friendly break down of some of the details of what goes into what we do. I also tell them about the quality ingredients I use and how I limit the amount of cakes I take on each week so that every cake gets my full attention. I treat their cake as ART, through and through.
Email 2:
Once I get a response (or that initial email from my online form), I respond with a "base quote" based on their guest count and their initial design ideas (if they have any). I am sure to explain that this is just a base price and will change according to design, flavors and guest count. At this time I also go into a brief explanation of my "Consultation Process" or "Tasting Process". Once again, I have a general template to copy and paste into my emails. I include:
-Where we will meet (I travel to my tastings, so we usually meet at a coffee shop)
-Cost of consultation (optional, we'll talk more about this below)
-An outline of what will be included in the consultation (time, how many flavors, flavor choices, the design process)
-What days/times I am available for consultations
-Attach a copy of my contract (letting them know this is just for them to get familiar with)
-Let them know what options I have for payment (Credit card, PayPal, check, etc)
I finish off with asking them if they are interested in booking a tasting, what day/time they'd prefer and what flavor choices they would like to try.
( I know this feels like a lot squished into a 2nd email, but it's efficient! It is saving time for you and them. They are usually just as happy to have all this information up front and get the process moving along!)
Email 3:
If they respond with yes, confirm the scheduled date and time. I start asking for inspiration for the design process (if they don't already have a per-desired design). I will ask them if they use Pinterest and would be willing to start or share an inspiration board with me. Tell them to pin anything and everything they think will fit into their wedding and the desired design of their cake. If they don't have Pinterest or aren't familiar with it, I will ask them to send photos of cakes they like and why they like them. I also ask if they would like to incorporate anything from the dress, invitation, or any other important items.
If they respond with no, I kindly thank them for their time and congratulate them on their event. I never lower my price. I stick to my guns, I would never want word to get out that I will haggle on prices. Once that happens, you know that people will always try.
My tastings include 6 of my most popular flavor combos. Now I know that sounds intense, but a lot of the cake, butter cream and fillings are repeated and combined differently. The client can choose to replace one of the flavor combos with a flavor of their choice for an extra fee (I charge $5 per flavor replacement). I make them into trifles because I find that my customers respond better to the presentation and the acetate keeps the cake moist and fresh while traveling. I am also presenting to them what has been proven time and time again to be my most popular flavors. When I am baking my cakes for the week, I will check on my "tasting stock" and if it needs replenishment, I will bake extra while baking for my cakes. While the cake is fresh I will cut it (see "Tasting Trifles" below) and freeze it right away. I do the same thing with my icings and fillings. In some cases I will still have to bake or make a filling or two the day before, but for the most part this system keeps me out of the kitchen all day prior to the tastings.
I charge all my clients $20 for a tasting for 2 people. An extra $5 for each additional person. However, this is deducted from their finial cake price when they book with me. So if they book with me, no loss to them. If they don't, no loss to me. I also ask them to pay prior to the tasting. I do this as an added security to myself, because I have traveled long and far to meet clients to have them not show up. Then I'm left to soak my sorrows in their sample cakes, someone has gotta pay for the gym bill. 😉
I find that charging for a consultation isn't for everyone. It is going to be a personal decision for you based on your circumstances. Do you have to travel to meet? Traveling takes more time, effort, gas money, supplies (cake boxes, utensils, etc). Do you go above and beyond on your samples? Not everyone does 6 flavors, stacked nicely in a trifle... know what I'm sayin? AND that's ok. Figure out what works best for you! This is just simply what has worked best for me.
Time is money. I will do my best to pump out at least two sketches based on the inspiration and any discussion of design we've had. I will save these for the actual tasting, no sneak peaks. Sneak peaks can lead to clients walking away with your sketch to another, cheaper baker (even though we know what that usually results in: disaster).
However, I make no promises. I don't always have the time to pump out sketches for every tasting ahead of time. I know that if I do have time, it's a nice bonus for both of us and gets me a few steps ahead. But if I don't have time, it's alright, that is why they have an hour consultation.
I do always try to prepare myself with some blank cake templates (coming soon!). Basically I print a few full sheets with different blank stacked cakes on them that fits in with their needs. This way I can just sketch right onto a nice blank canvas without having to sketch the actual cake out. Saves time and sanity.
Want to make the kind of cakes you WANT to make? A lot of couples can feel overwhelmed by finding a cake design on their own. Often they end up just “settling” with a simple design because they don’t know what is really out there. So help guide them! Create Pinterest boards with the kind of cakes you want to create! Organize them by color or style. Direct your couples to these boards to find inspiration.
(if you have the allocated space to do in-home tastings, check out Shannon Bond's article here)
Because I do not have a presentable space to do an in-home tasting, I have to meet my clients. I never meet them at their home. Not only is it not safe (anyone can ask for a tasting), but it's also a distraction for both parties.
I have a map of coffee shops throughout the city that I find to be easy going and not "too busy". I then ask them where they live and find the most convenient coffee shop between both of our locations. Remember, this is one of the reasons why I charge for my tastings (gas, time, etc).
If you have multiple tastings back to back, set up at one central location. Trust me, it's not worth the stress of trying to drive from coffee shop to coffee shop. Let them come to you. If you had a store front, they'd be doing that anyhow.
Get there 15 minutes early and allow for at least 30 minutes between meetings. It's easy for consultations to go past schedule, allow some breathing room between consults. It also gives you some time to collect yourself and "recharge" for the next client.
Buy a coffee... for yourself. Don't piss off your coffee shops! They don't appreciate "squatters" just using their space without purchase. I don't suggest buying a coffee for your clients UNLESS you've designed your consultation fee to include that. Otherwise, you may be finding all your fee going to their coffee.
If I'm at a coffee shop, I make sure to let them know they don't have to eat their samples now. That is one of the perks of having them packaged "to-go". Some do not feel comfortable eating in another establishment. It's their choice.
When you are meeting at an offsite location, you can't lug around your display cakes and set them up at every coffee shop. Unless you're looking to get the "who is this lunatic bringing wedding cakes into our coffee shop" look. 😉 So instead, I set up a slide show of all my best cakes on a tablet that I then display on the table. You can also use a computer, but I find that coffee shop tables are usually small and computers take up a lot of space.
I introduce myself and ask them about themselves. I ask the couple how they met and other friendly small talk. My goal is to make them feel comfortable and like they are not in a rush.
I explain the flavors and tell them to dive in.
I clarify all per-discussed information: name, venue, date, guest count, etc.
-As they start to try their samples, I start to talk about the direction of the design.
-Show them my sketches (if I have some).
-If they want to change or add on to the sketches, I start preparing edits or beginning new rough sketches.
-If they are having a hard time envisioning, I show them references on my computer.
If a design is not solidified but the couple is pretty sure they want me to make their cake, I offer additional sketches. I am sure to let them know a fee will be applied for my time.
- Once we have solidified a design, I take a moment to draw up a quote.
- We discuss the quote, if they are all in, I collect deposit, fill out the contract and sign contracts. If they need more time to think it over, I send them home with a filled out contract to sign and send back to me.
-No matter the conclusion, I always stay friendly and professional. This is their big day, they have to trust that I will do the job beyond a doubt.
-I thank them for their time and express my excitement to be working on their cake.
Within 48 hours I will thank them for their consideration and break down their order in an email. If they have paid their deposit, I will send them their sketch also.
Download Traveling Tasting Checklist
A step-by-step visual check list of everything that needs to be done before, during and after a tasting!
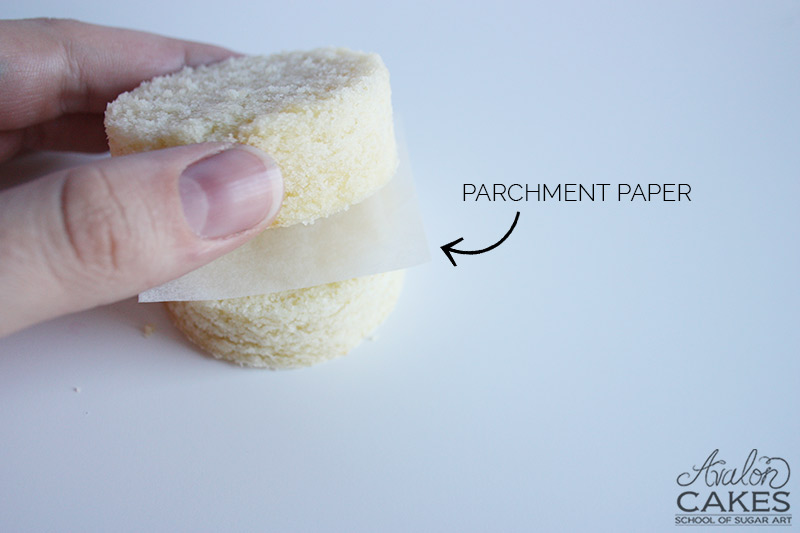
I prep my fillings, icings and cake by portioning them and then individually wrapping them and freezing them. Because they are individually wrapped, I don't thaw and re-freeze big batches over and over. That's a big no-no for food quality and safety.
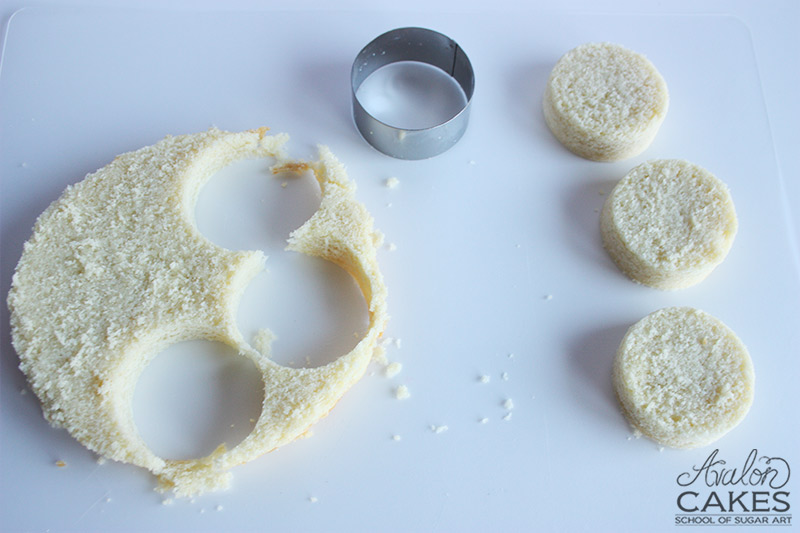
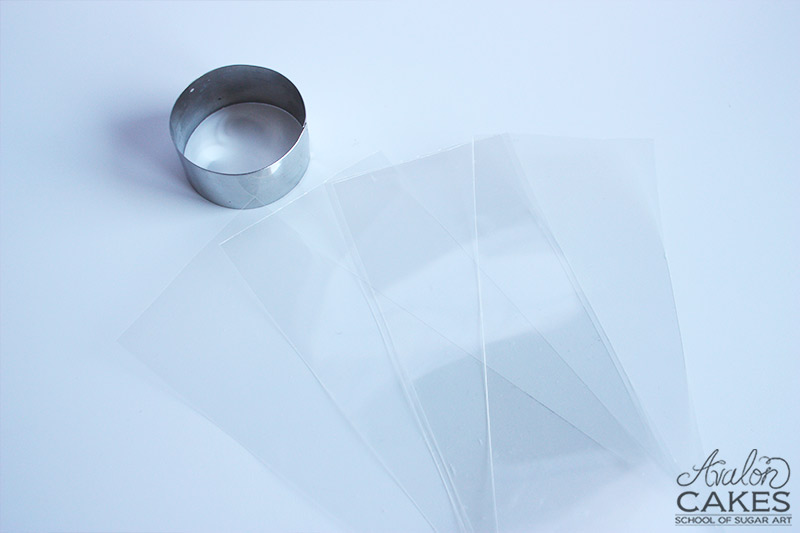
I use a 2" round cutter. I find this makes the perfect size trifle for 2 people to share.
I will check my "tasting stock" and evaluate if I need to bake more WHILE I'm baking for my cake's that week. I will also do the same with icings and fillings also. If there is any left over, I always freeze that too. This saves so much time in the long run.
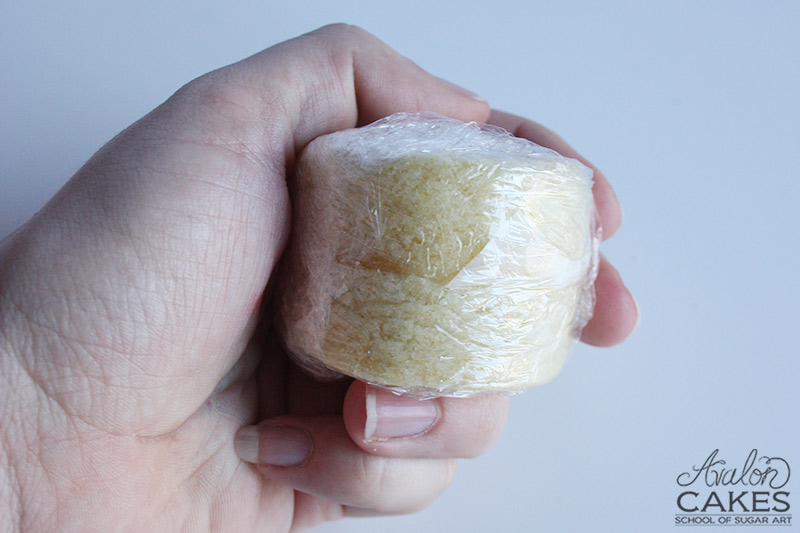
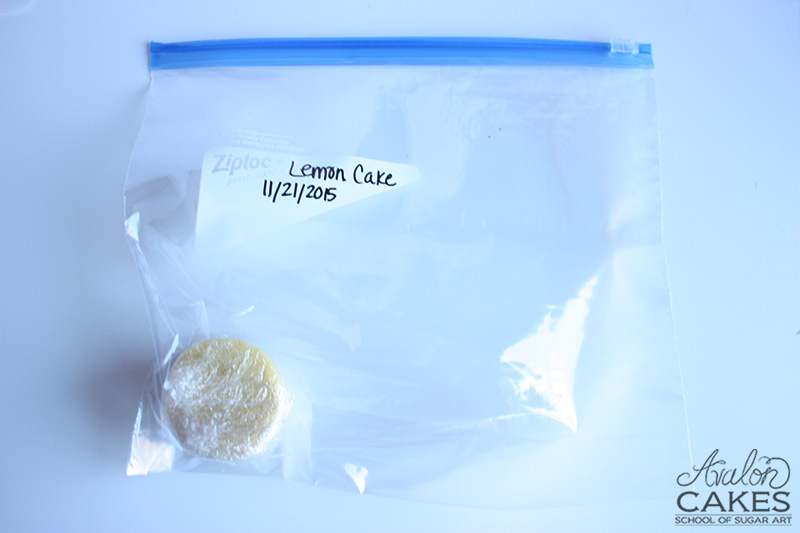
I wrap all the samples with plastic wrap, put them into a freezer bag and date them. If I am replenishing into a bag that has older cake in it already I will date them individually and be sure to rotate the "older" to the front.

I use 3" acetate. I bought a big roll almost 2 years ago and am still far beyond going through it! Using acetate really seals in the freshness, allowing no air to touch the cake (without having to frost little tiny cakes!) It also allows for your customers to see all the delicious layers of goodnesssss.
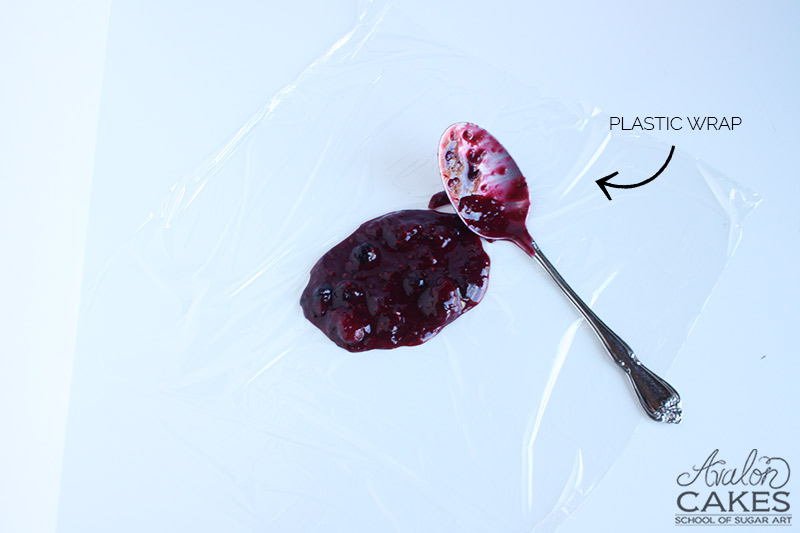
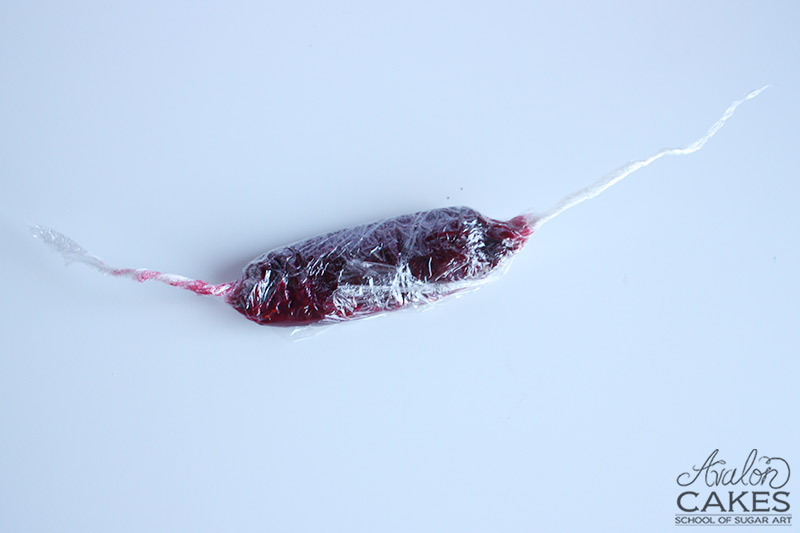
I'll pull out my portions of icing and filling the night before to allow them to thaw (icing on the counter top, filling in the fridge). I then just tie off one end of the plastic wrapped filling and pull through the other side into a pastry bag. This saves me on the expense of pastry bags and keeps the pasty bag clean and reusable.
Tape it nice and tight, you want it to hug the cake. You also want to make sure the acetate is straight and not creating a smaller opening at the top.
Sometimes it pays off to do something a little special! It helps you stand out from the rest and it will really feel like you are paying attention. Small thing, lasting impact, plus it really only takes two minutes! Just wait, you're going to hear them say "Awwwwwe" (or, at least "she" will!).
I use a mini stamp set I found in the $2.50 section of Michaels. I suggest you check your hobby stores first before finding them online, however I did find similar ones here and here.
I tape them together so they are easier to handle. Be sure to fold over a tab at the end of the tape so it is easy to remove later.
I tape them together so they are easier to handle. Be sure to fold over a tab at the end of the tape so it is easy to remove later.
And if you want to get realllll corny with it, add some "love" to the back! 😉
Box them up and complete the presentation with a little twine, baker's twine or ribbon. Often I will also add a business card or a little "Enjoy!" tag with my logo on the back just to help them remember the me when they are making their choices.
Resources:
Kraft Boxes - a little less expensive and still very on trend and good presentation.
Clear Boxes - more expensive, but great presentation
Wood Forks - great price and green!
Rubber Stamps or Rubber Stamps- Look for these are your local craft store first!
Acetate Collars - This will LAST forevvvver. Seriously.
Twine - The more rustic approach (what I used).
Last modified on December 23rd, 2022


I'm Avalon -- and I'm not your typical cake decorator. I'm obsessed with fusing the world of ART and CAKE. Sugar is my canvas. If you're down to get messy and dive into a whole new level of cake, take my virtual hand, cause I've got so many secrets I want to show you! learn more>>

Join 1000s of others in our Online Cake School and learn how to make incredible sugar art!


