When I think “winter”, my brain goes straight to the nostalgic feeling of snow globes *sigh*… such magic packed into those little things. Especially as a child, I remember trying to make a snow globe myself... consisting in those little plastic bulbs you’d get with your toy from the 25¢ machines AND, of course, glitter. Which then, of course, resulted in a tragic scene where a glitter bomb water mess left my mom’s kitchen table in temporary ruins.
So NATURALLY, as an "adult"....I still want to snow globe "all the things"… not as easy as one would hope in sugar.
However, Sandie and I came up with a 3D snow globe cookie that finally satisfied my snow globe fix!
I worked on the gelatin globe while Sandie worked the cookie side.
Now, sure, you’re not going to want to EAT the gelatin (even though you can)… but you know how we like to keep as much “edible” on our cakes and cookies as possible. Simply just remove it or eat around it. 😉
It’s great as a “center piece” cookie in a set of Christmas or winter themed cookies.
So, shall we?
Here is a video I did showing the snow globe in action and how to make the globe including tricks and tips:
24 hours before you start your cookies, begin making the globes!
1. First, make a gelatin mixture according to instructions (see recipe at bottom of the page).
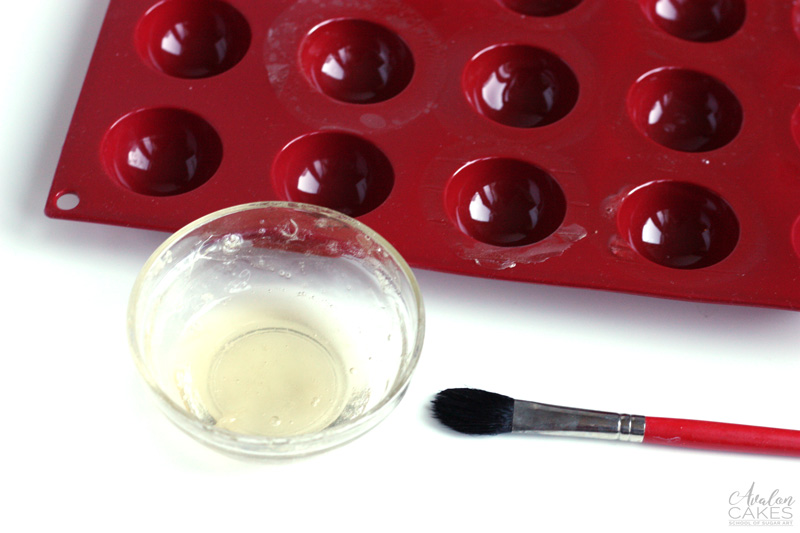
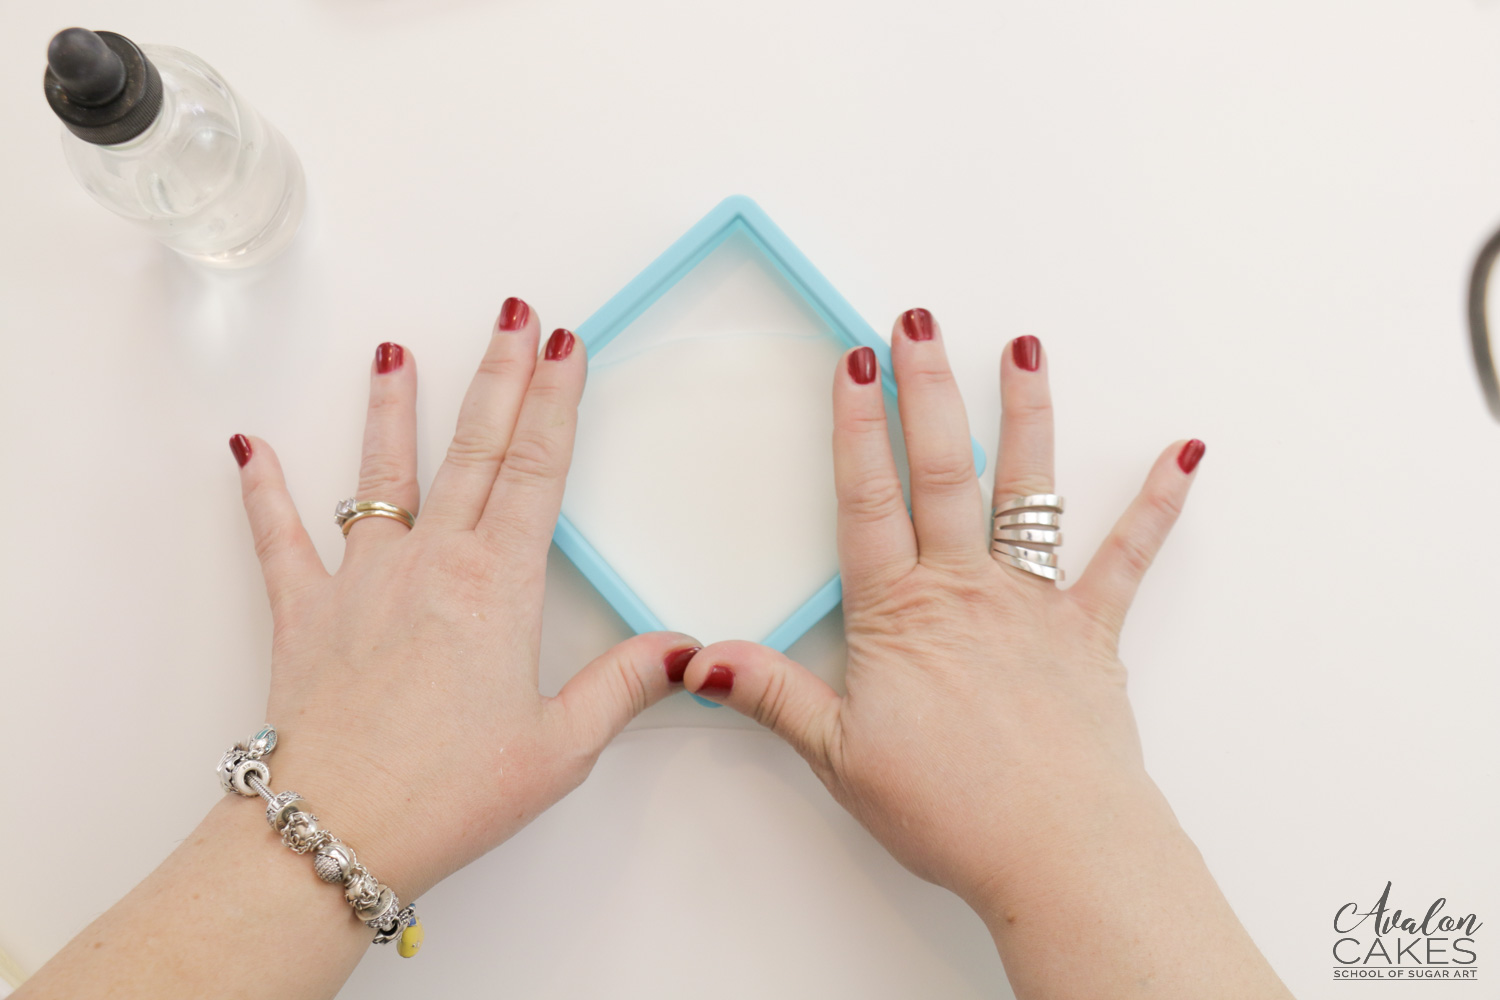
2. As evenly as possible, paint the inside of the dome and work your way over the top to make a lip. QUICKLY flip over your mold onto a drying rack or parchment so that the gelatin does not pool at the bottom of the dome. Wait 20 seconds and then repeat in the other domes.
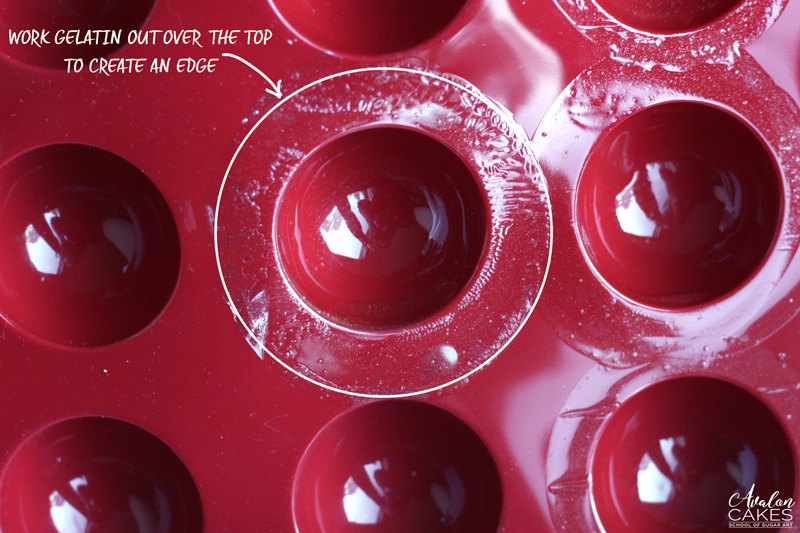
It's important to create a lip around the top edge over the dome, this will give us a way to connect it to the cookie later on! You may want to do a second coat of gelatin.
Allow to dry overnight until no longer sticky and gently pull away from the mold.
Tip: Always make more than you need, some will rip when they come out and some might have holes.
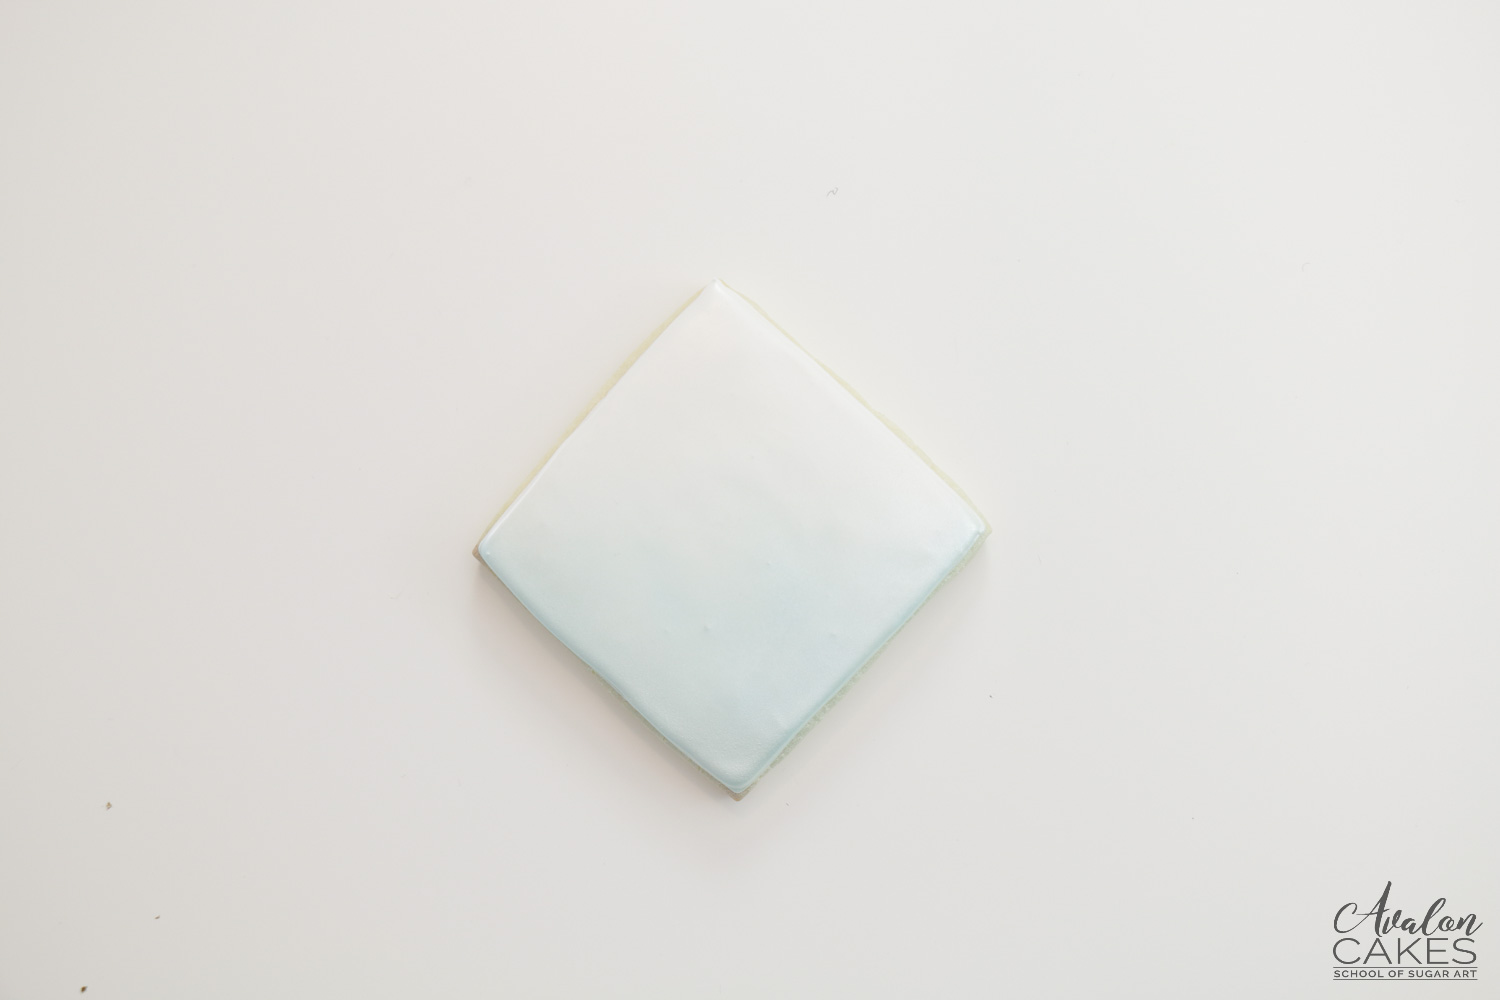
3. Ice your sugar cookie (ours is a 4"x4" square) with royal icing, allow to dry (make sure it's completely dry before adding the gelatin).
Mix some airbrush silver sheen with some blue airbrush color. Then using an airbrush, lightly airbrush a corner of the cookie horizontally across the bottom for the darkest color then spraying lightly as you reach the middle of the cookies to give an ombre effect.
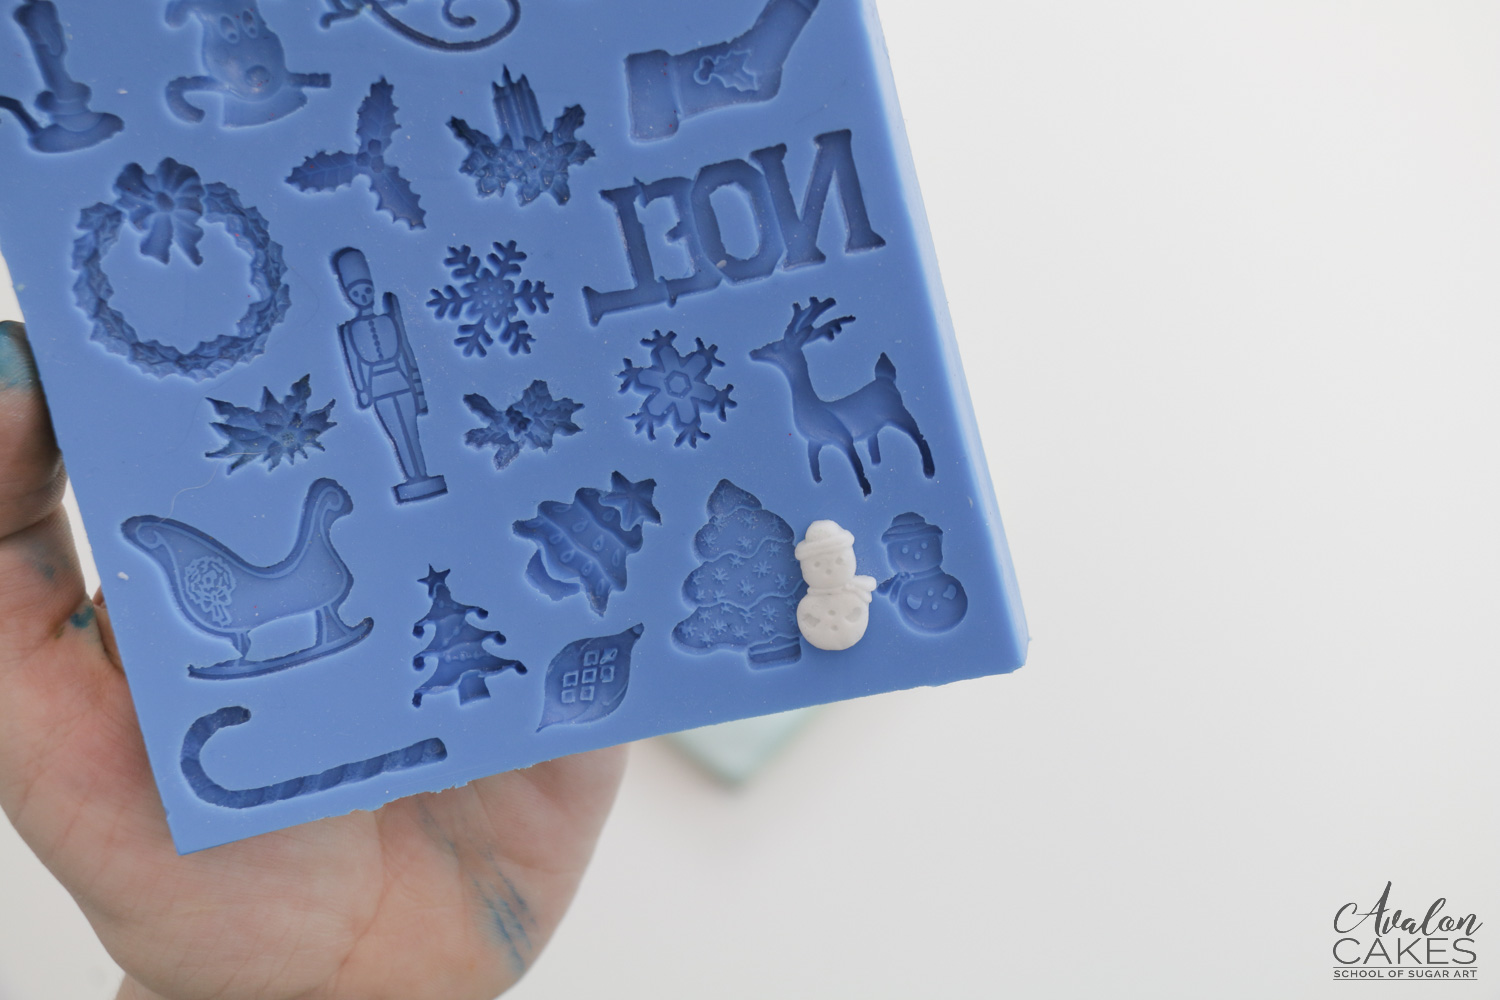
5. Using a very fine paintbrush and gel food color, paint the details on your snowman. You might need to add a tad bit of water or alcohol to dampen your paintbrush to smoothly paint the details.
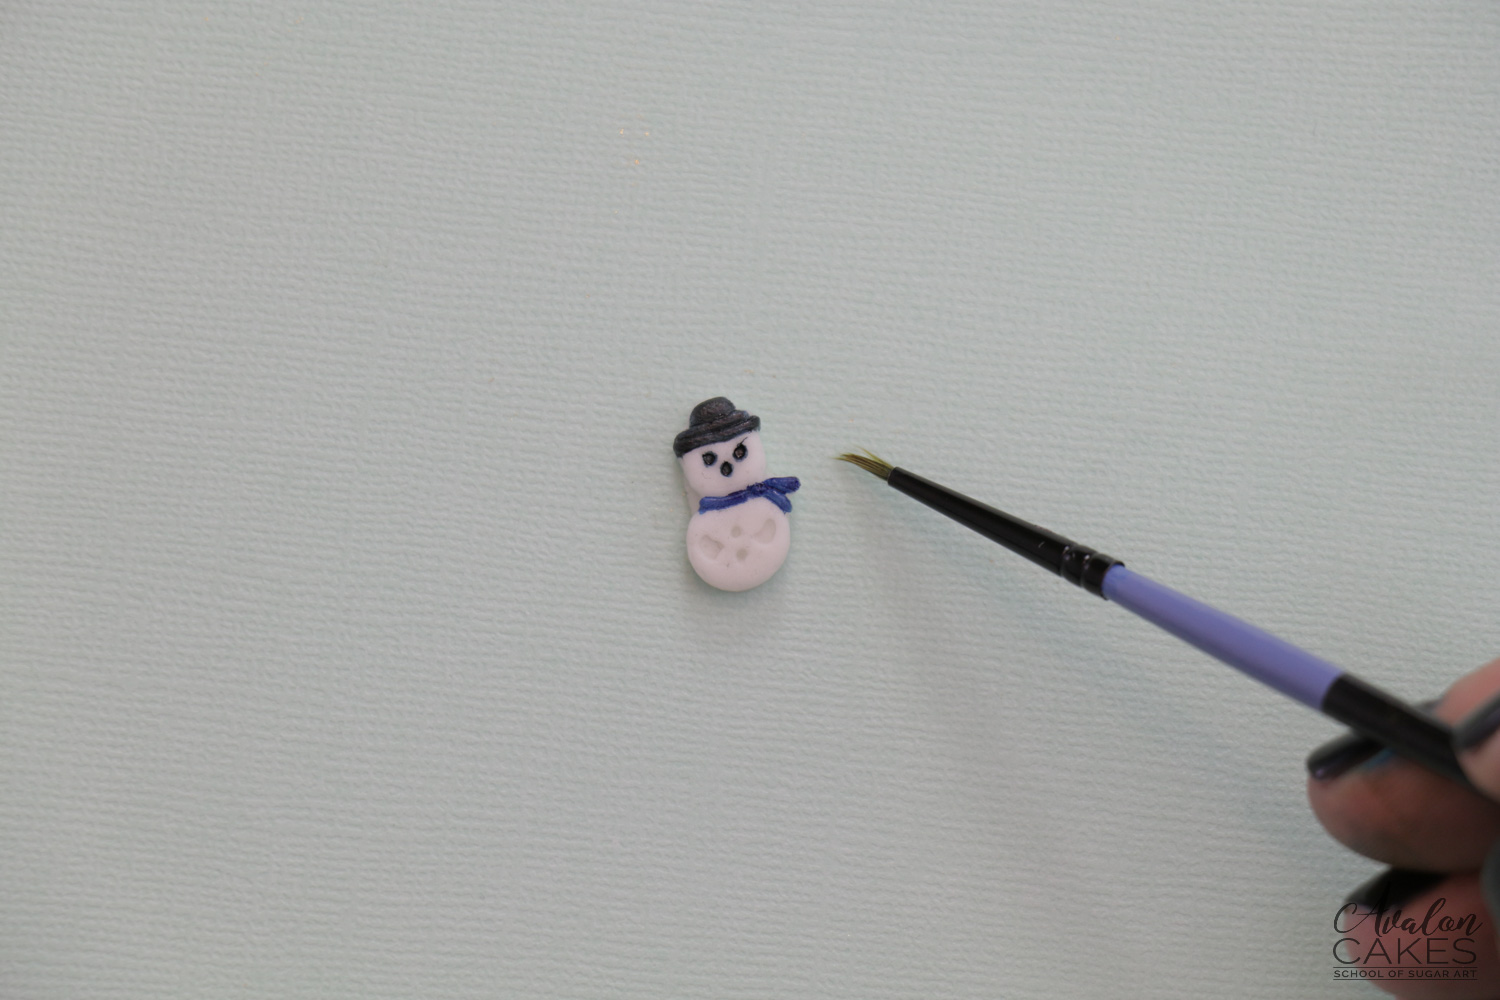
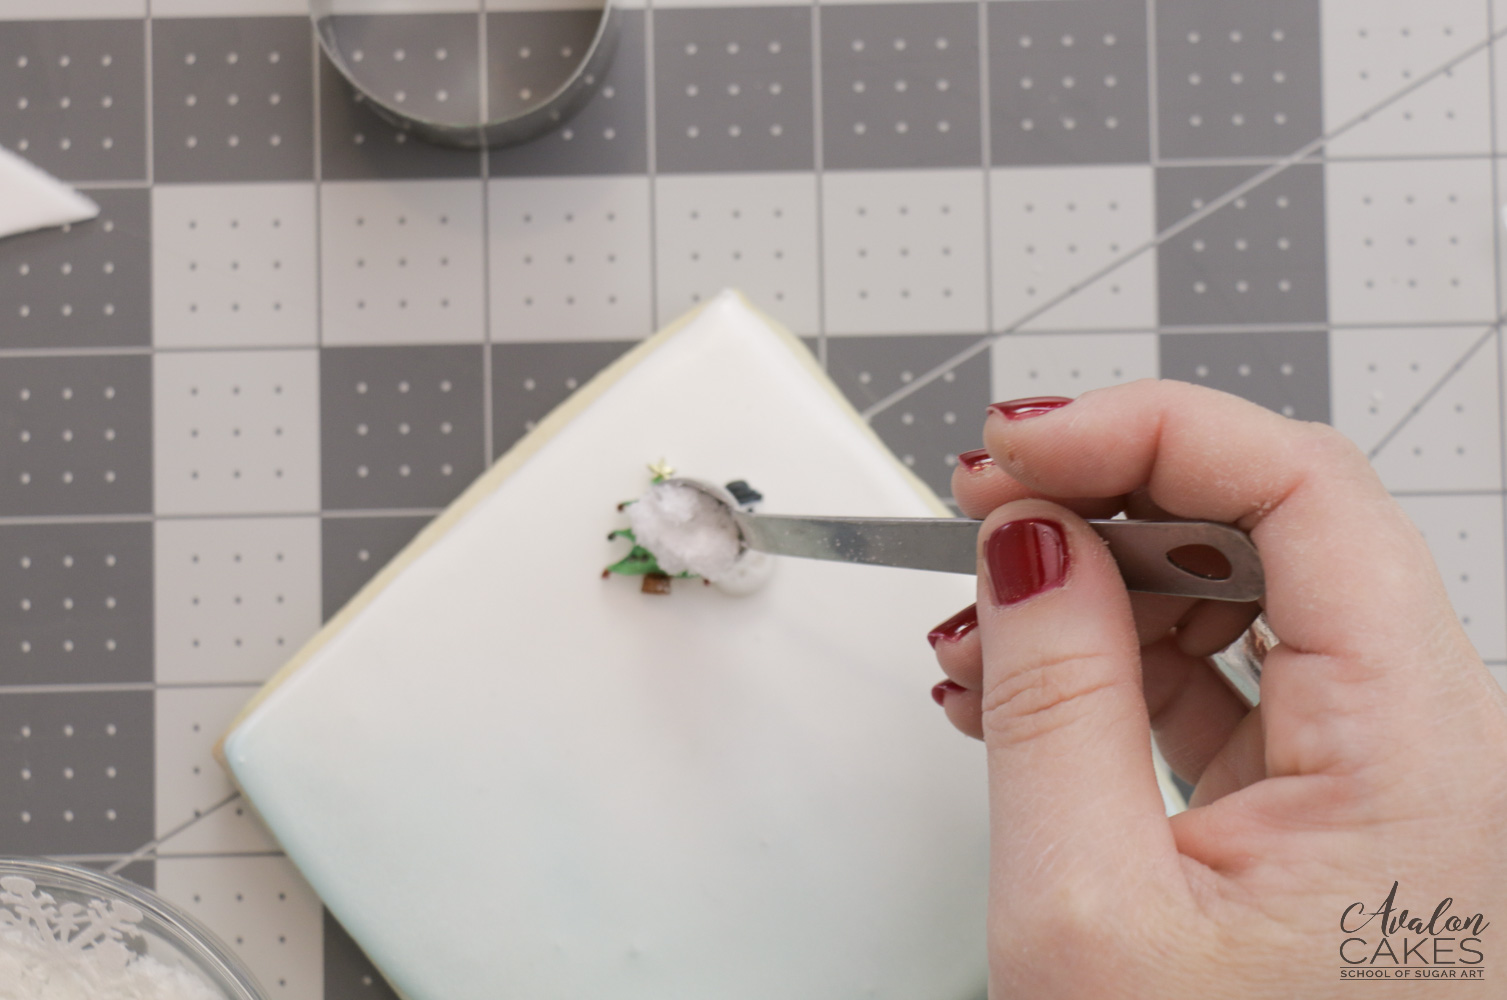
We did the same with our tiny Christmas tree!
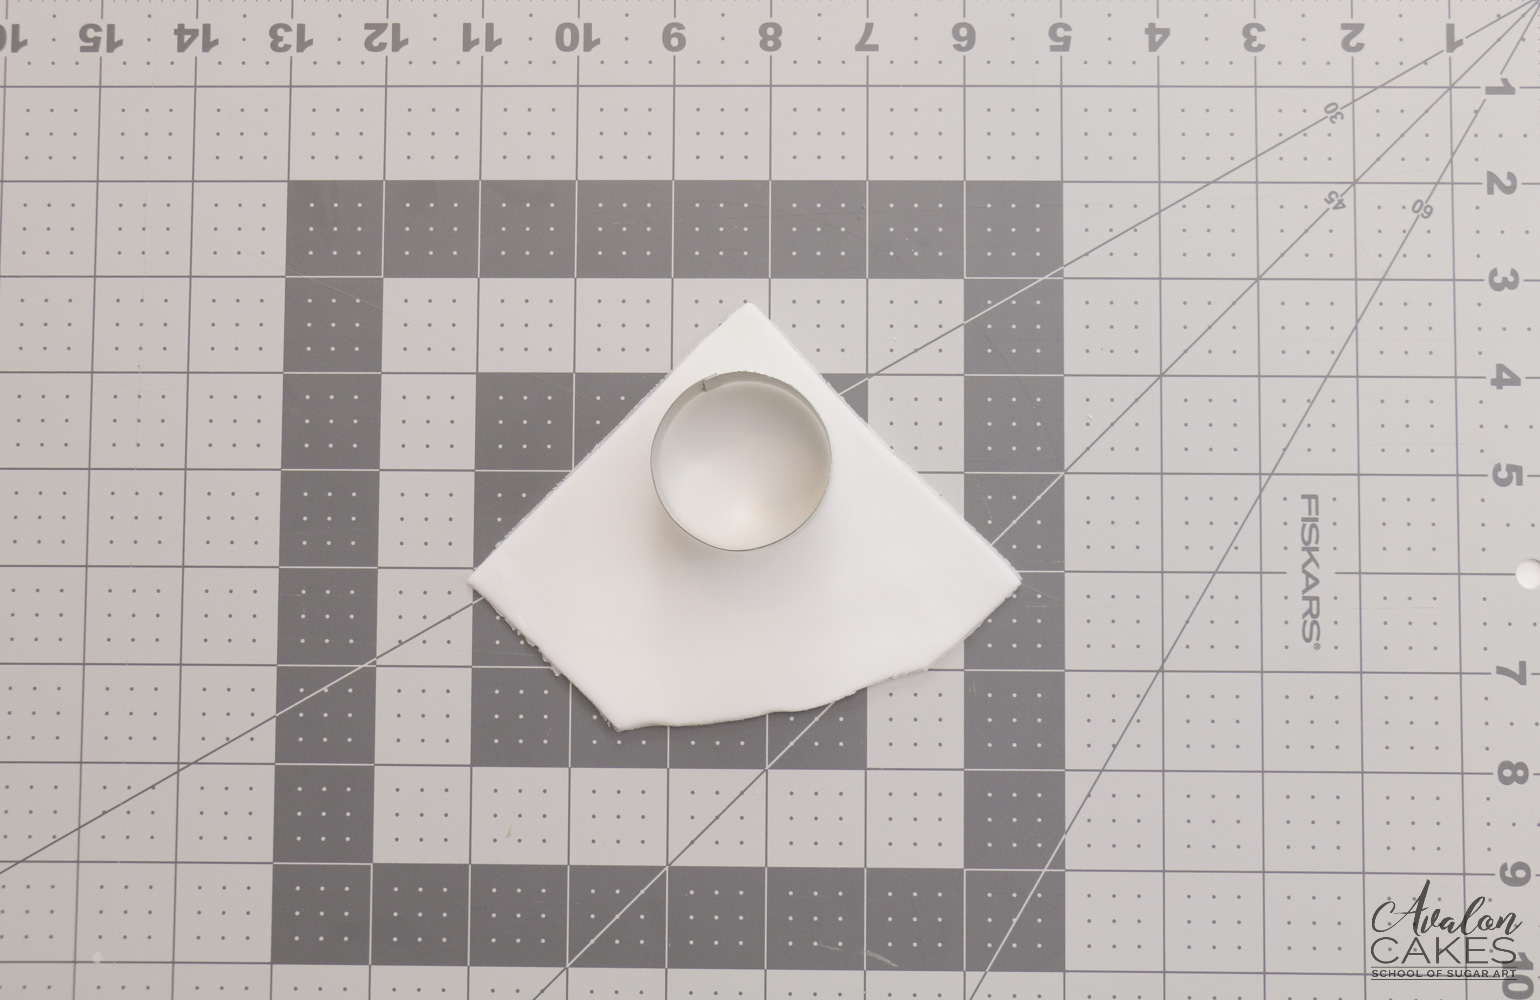
6. Next, roll out a piece of white fondant to a thickness that resembles a tortilla. Then using the same square cookie cutter used to make the cookie, cut the fondant.
Only the top portion of the square fondant is going to be used, that is why you see the uneven edge on the bottom.
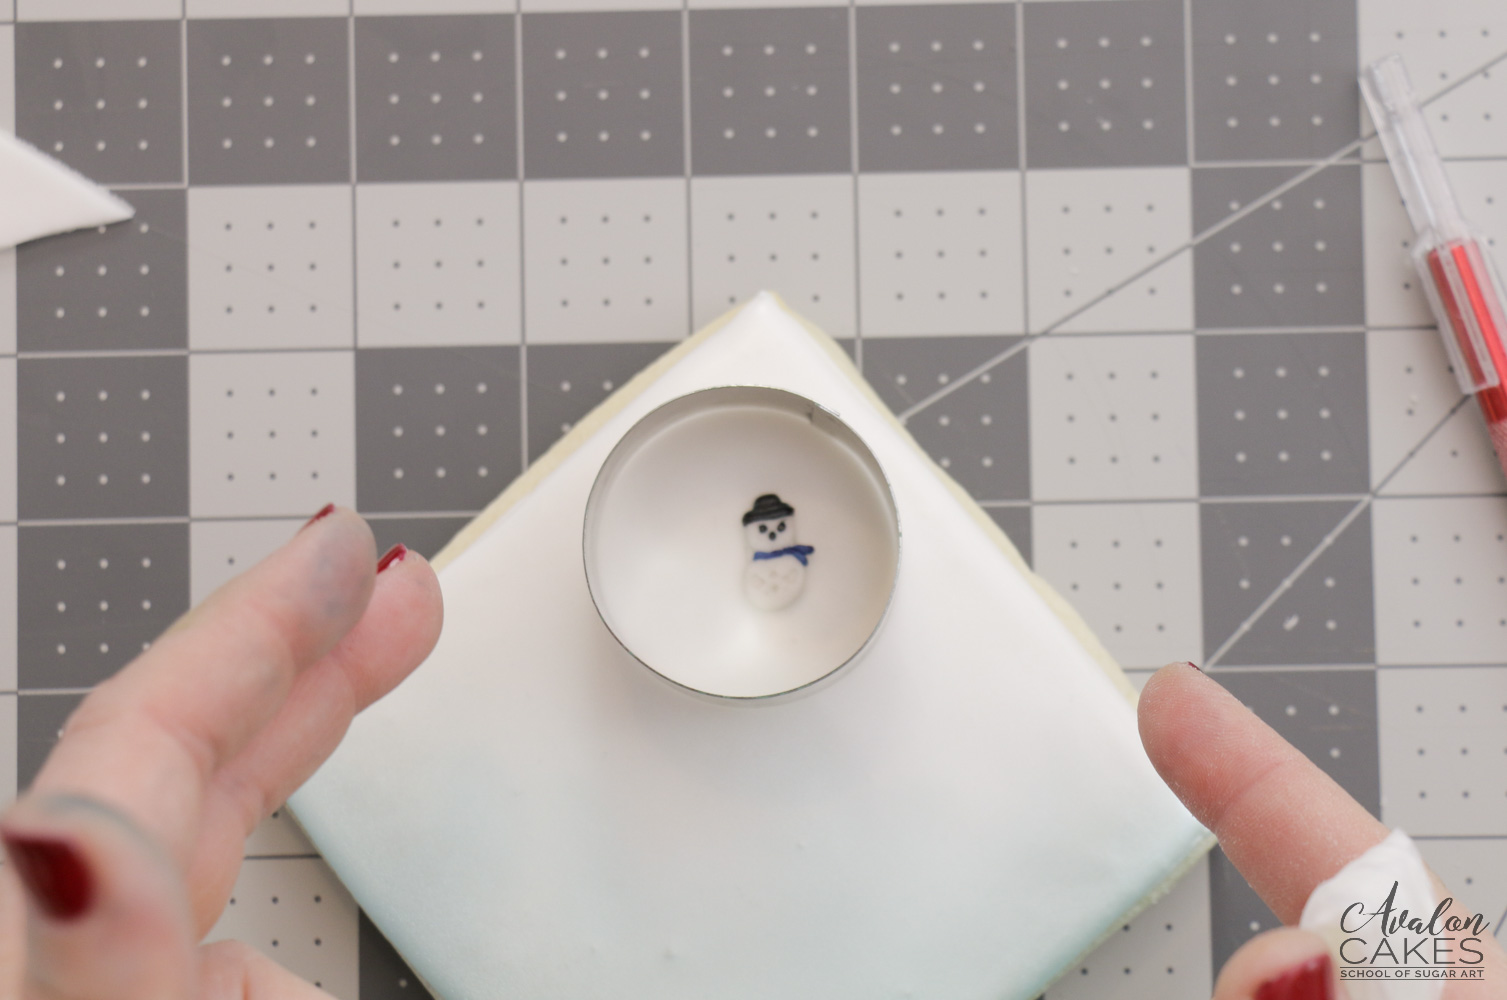
7. Using a 2 " round cutter (or same size as YOUR gelatin dome), cut a hole on the upper corner of the fondant square.
8. Using an X-acto knife, cut a wavy line through the middle of the fondant square.
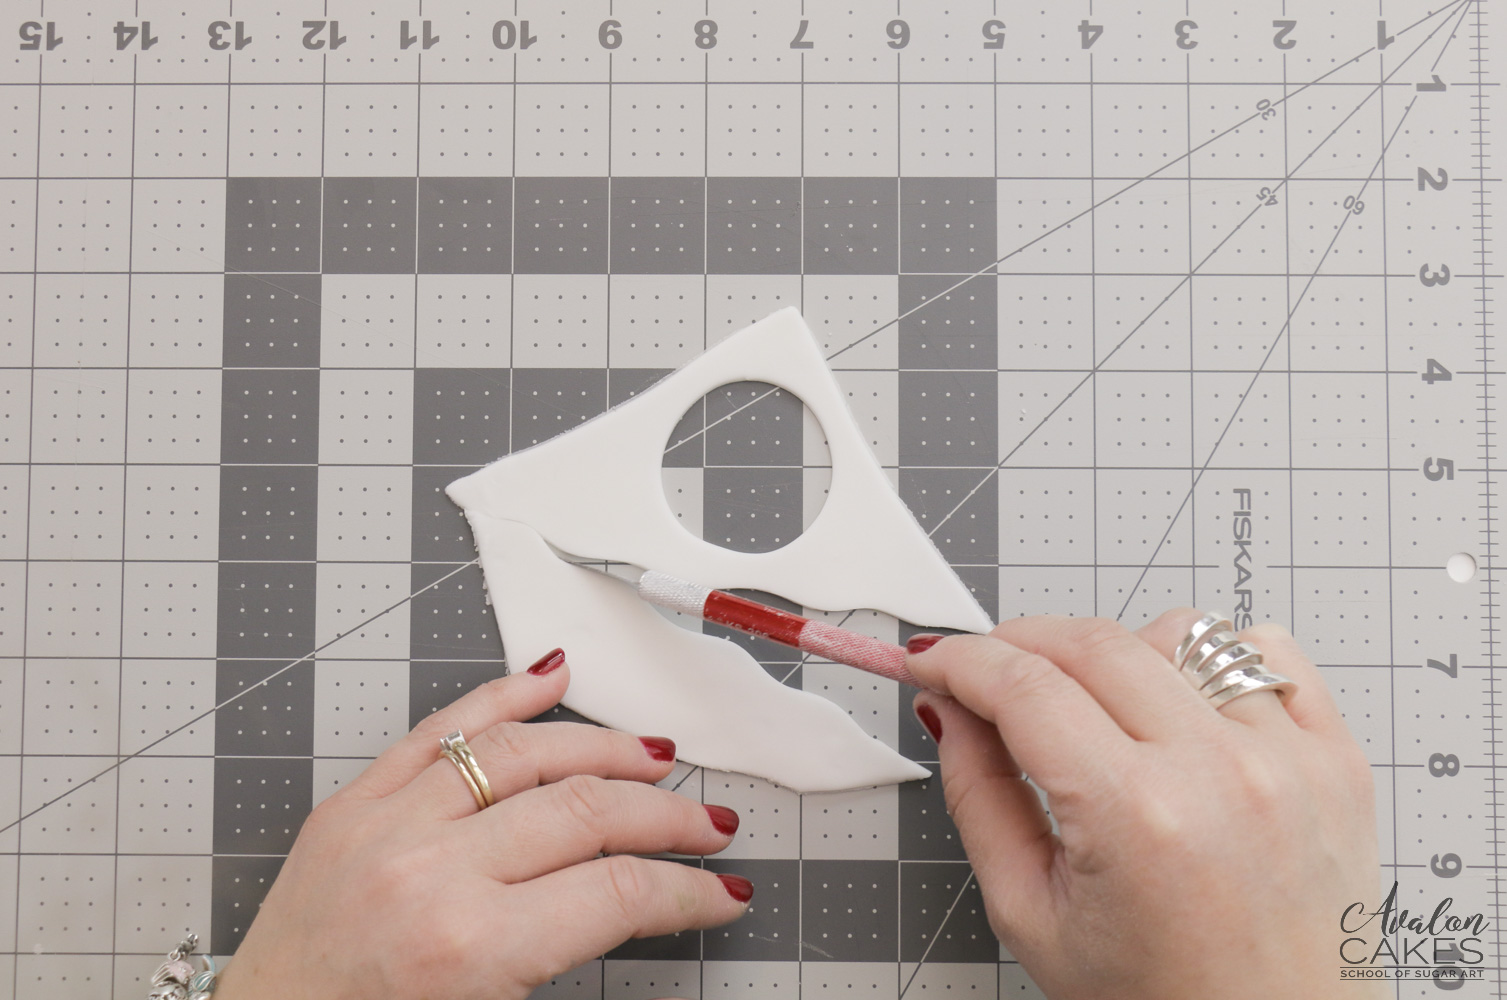
9. Use your cutter as a reference when placing your figurines in your globe!
10. With a small spoon, add a pile of your favorite sprinkles on top of your figures. We used a mix of Wafer Paper Snow (see below) and non-pariels for our snow effect.
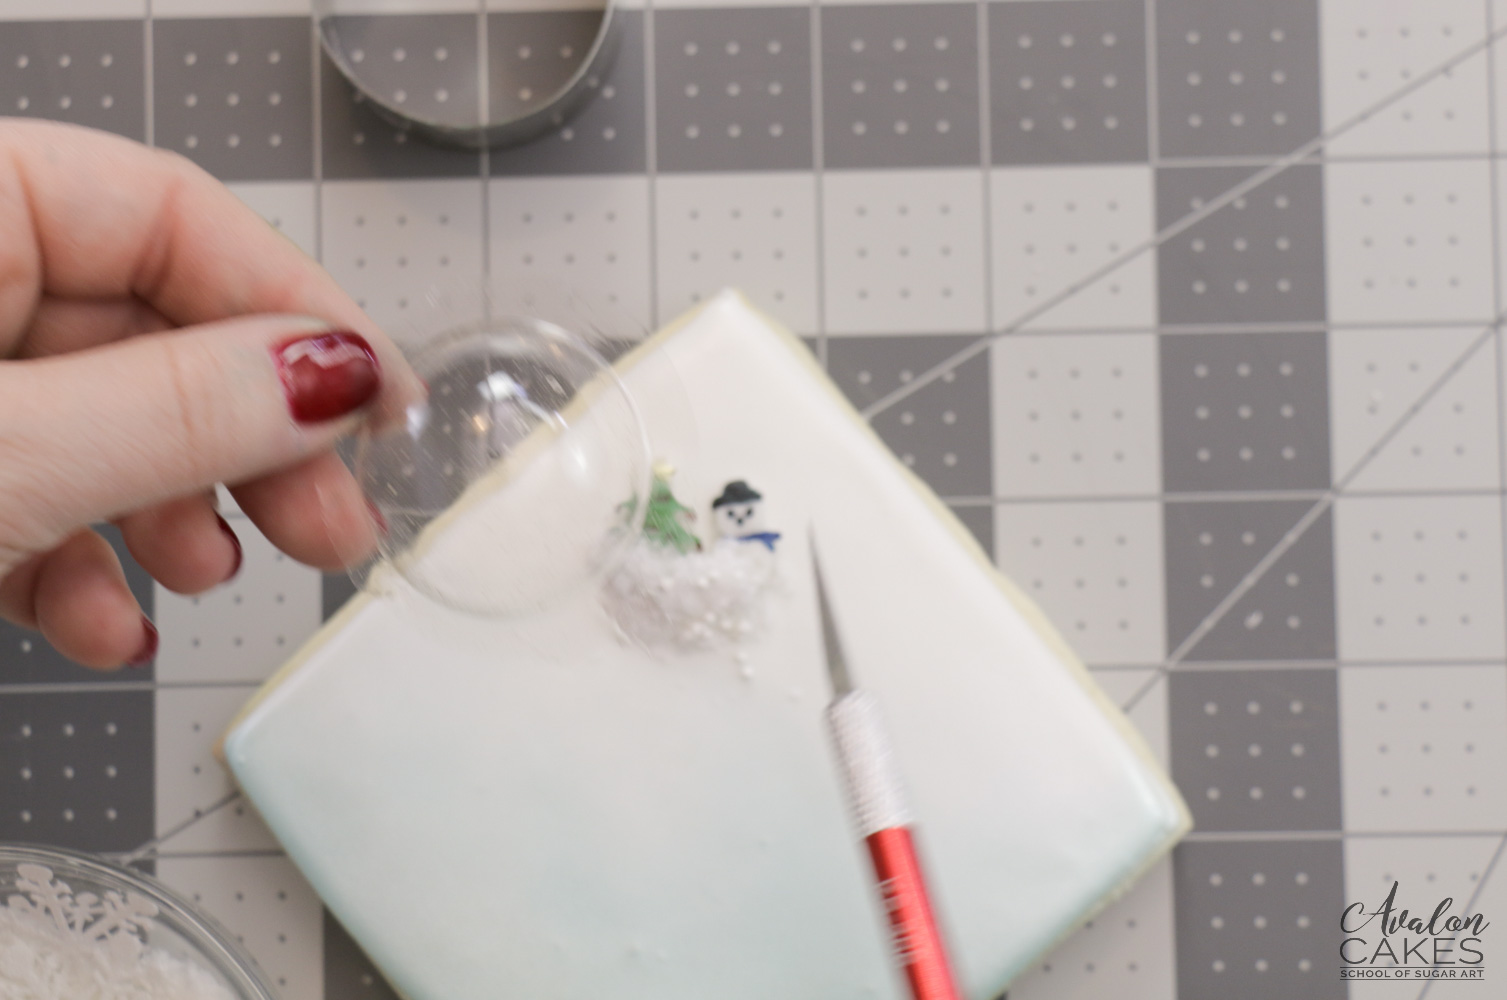
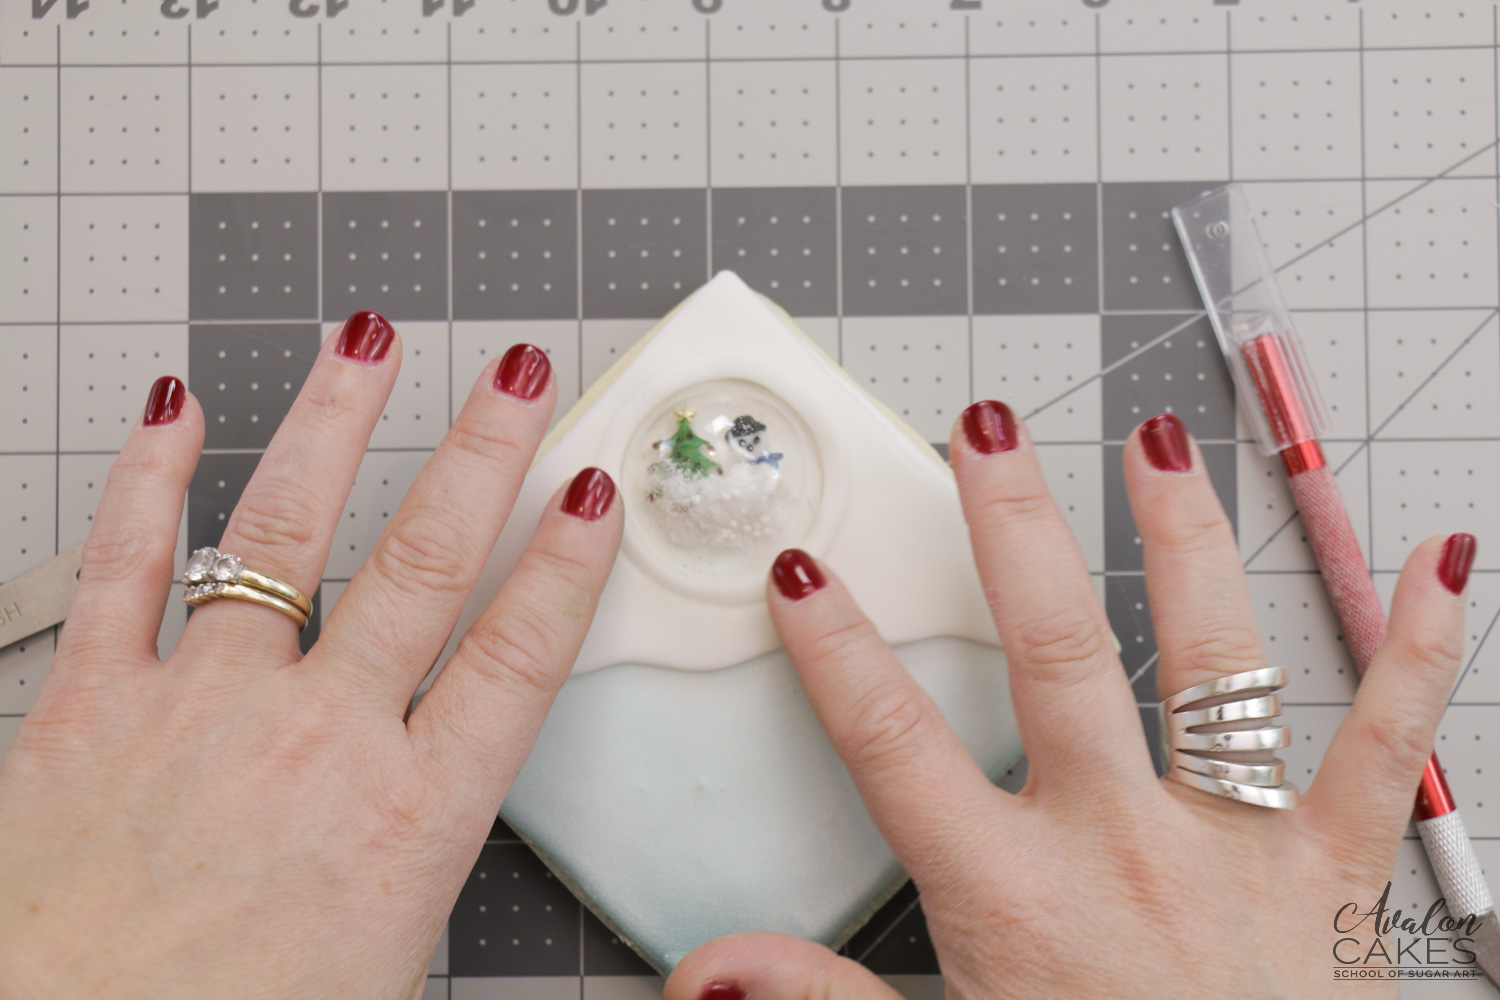
11. Place the gelatin dome over your snowman, Christmas tree and snow with no adhesives. (Please note: Water will instantly melt your gelatin and disform it.)
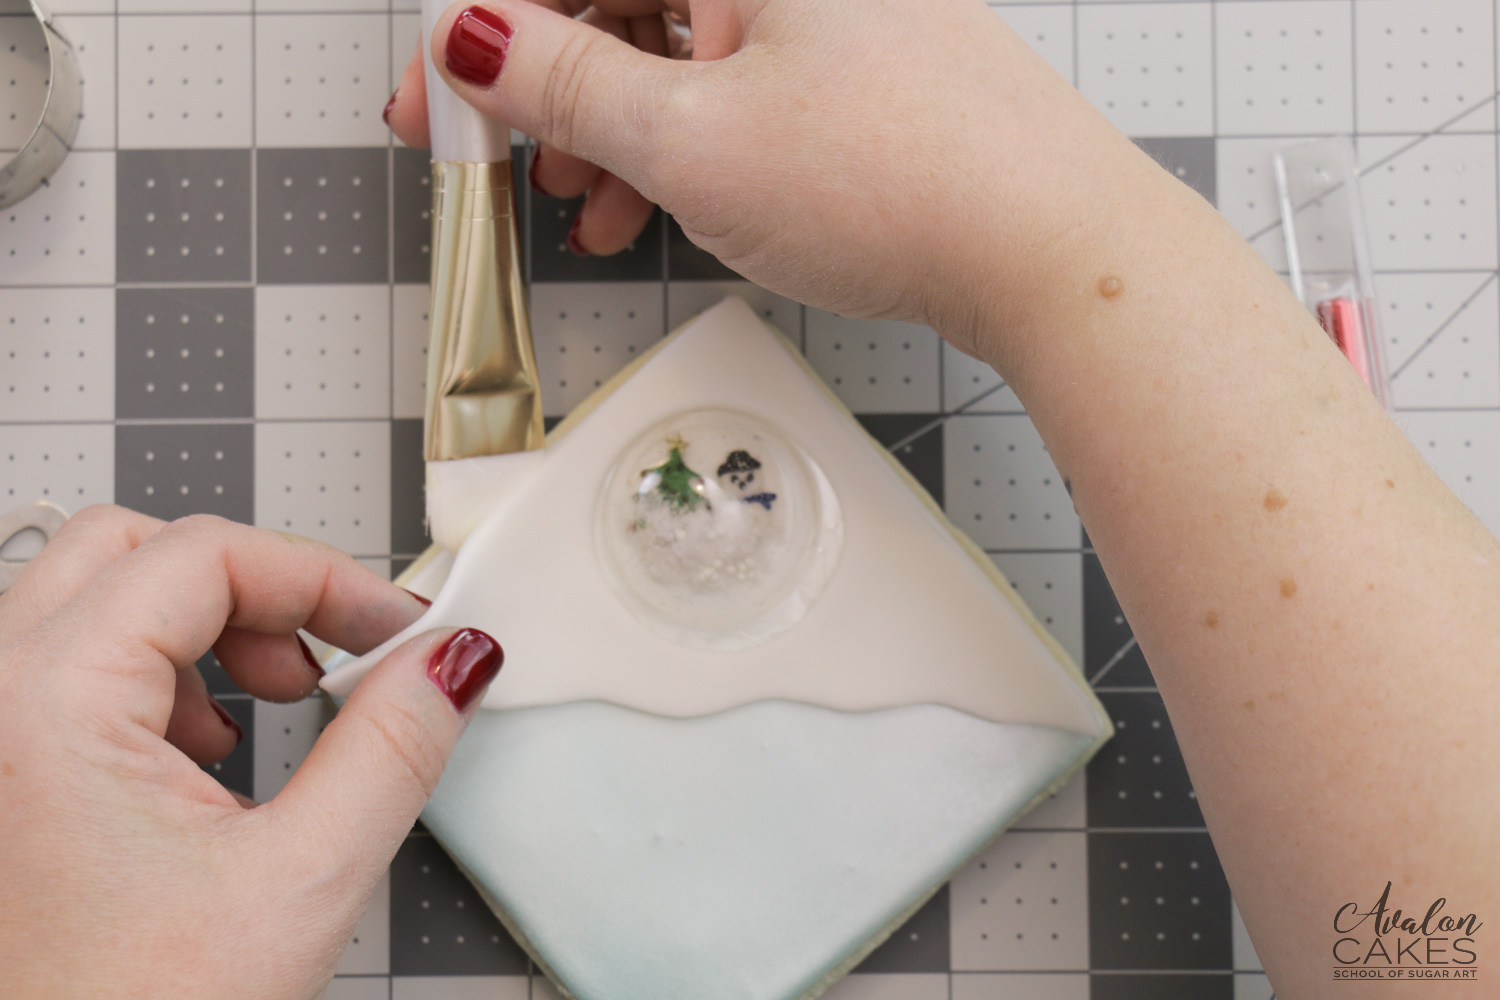
12. Add your square fondant piece over the gelatin dome making sure the hole in the fondant is positioned correctly. Position it and then paint just around the edges of the fondant to right before the edge of the gelatin globe (being sure NOT to touch the edges gelatin globe with the water) with a little bit of piping gel. Usually I would use shortening when I didn't want to risk the water, however we really want a solid permanent adhering to seal this together, and shortening isnt' permanent.
Tip: I like to dehydrate my piping gel, simply leave it overnight with the lid of and cover it with a paper towel. This allows some of the moisture to evaporate (if in humid climate, 2 nights might be better).
13. Using the 2-inch fondant circle we cut out of the square piece earlier, then using a slightly smaller cutter (1.5") to cut inside the 2" circle.
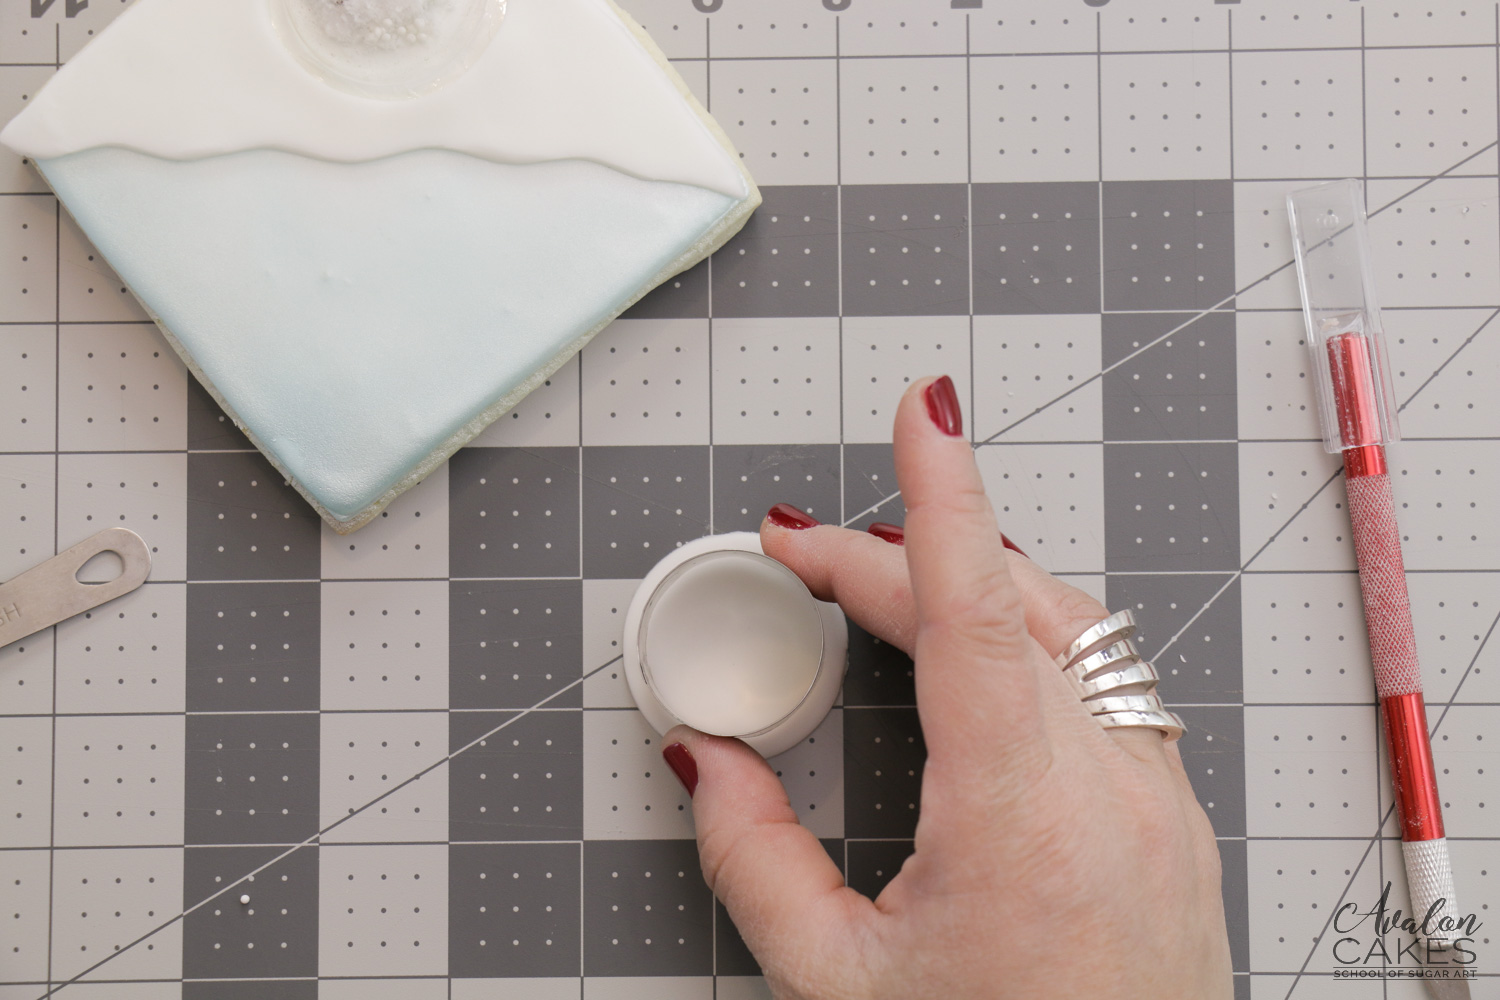
14. Place the border over the gelatin dome. This time, use vegetable SHORTENING (or white fat) to apply (remember, water or anything containing water will melt and deform the gelatine).
15. Place a piece of paper towel on the royal icing portion of the cookie, then using piping gel, apply a thin layer over the wavy edge of the fondant.
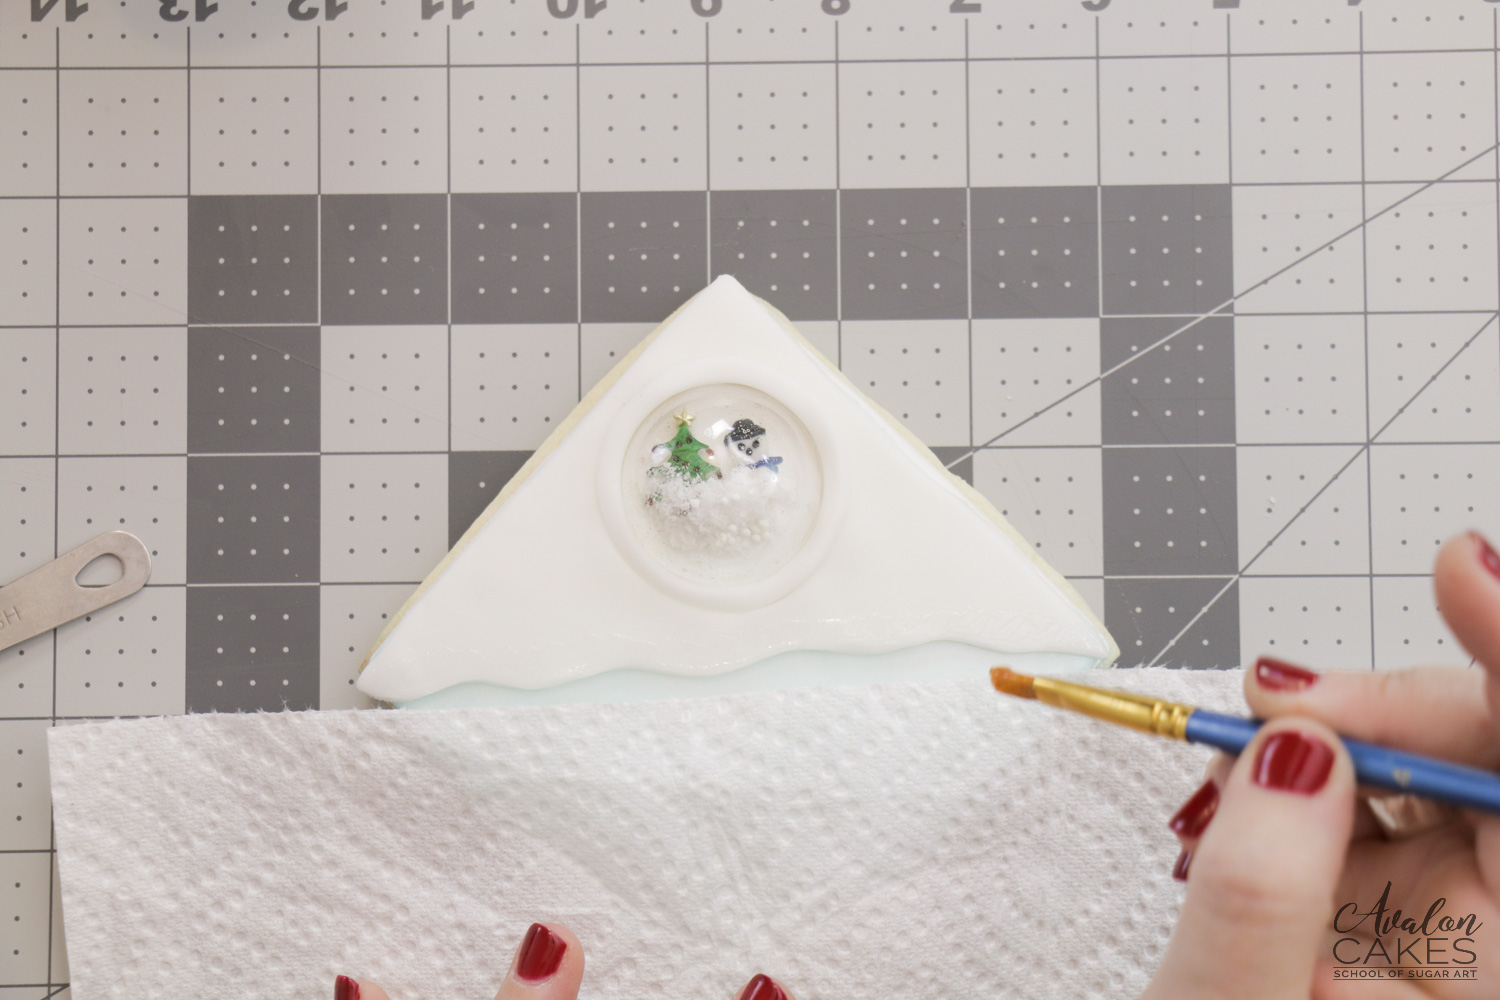
Then apply the wafer paper snow or your favorite sprinkle over the piping gel.
You can brush off the excess snow and leave the cookie as is or follow the next steps for added details.
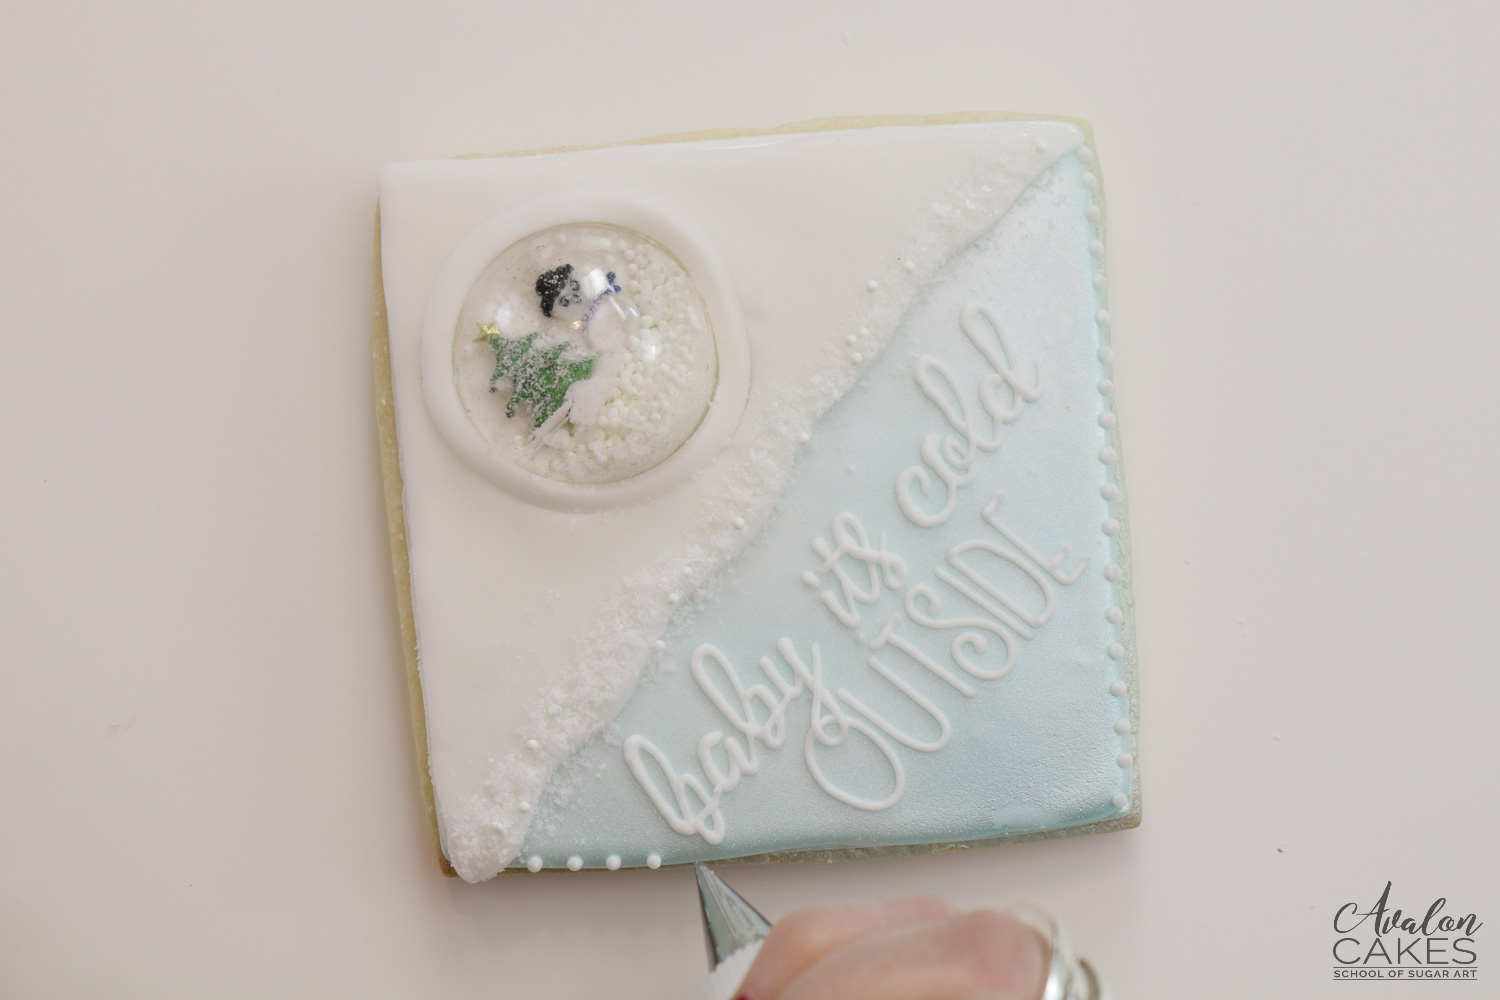
Using white royal icing piping consistency, a 1.5 PME tip, and a Pico Pocket Projector (or a template), we piped "baby it's cold outside" on the bottom portion of the cookie.
Then we piped tiny dots along the edge of the bottom portion of the cookie.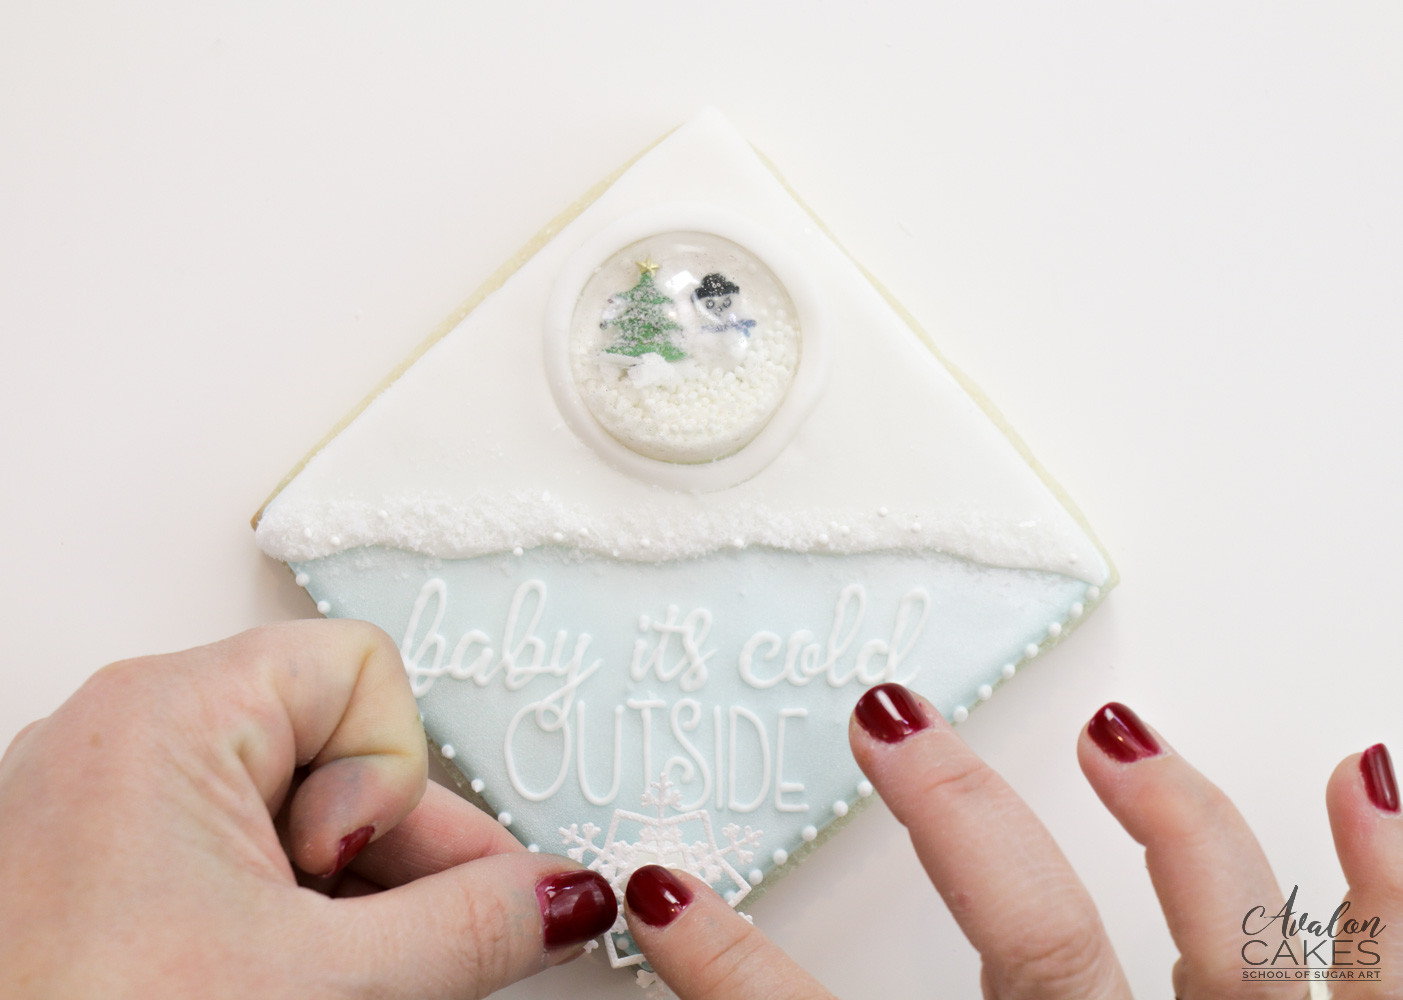
We added a little snowflake for our final touch! You can achieve this effect using a paper punch and some wafer paper -or- use a lace mat & edible lace-like Sandie did.
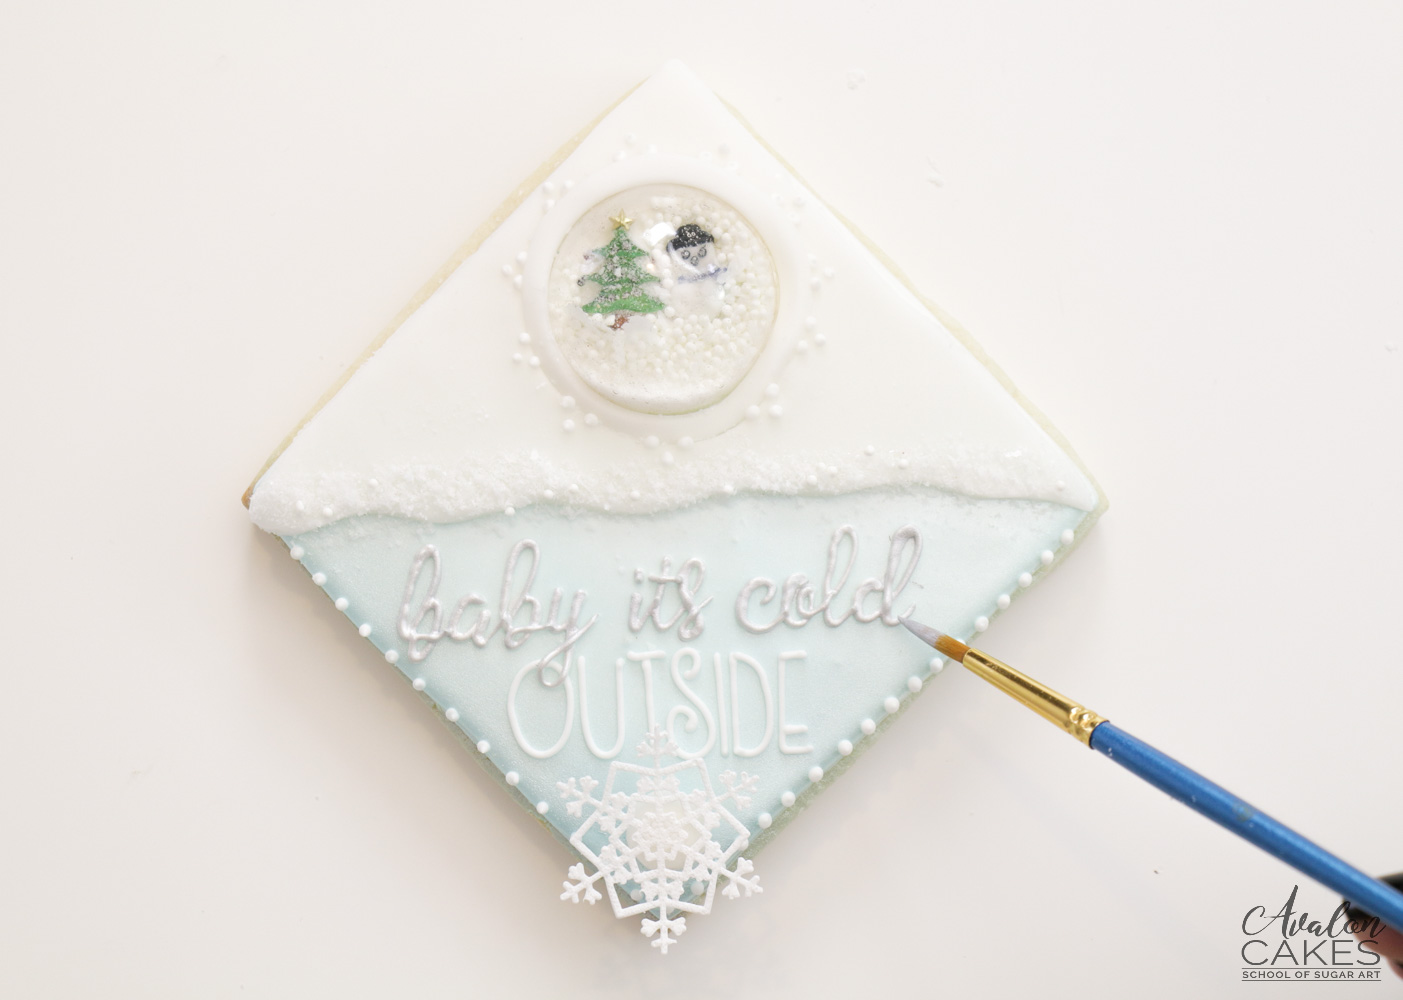
Last, but not least, we painted the lettering with edible silver metallic paint from Edible Art Paints.
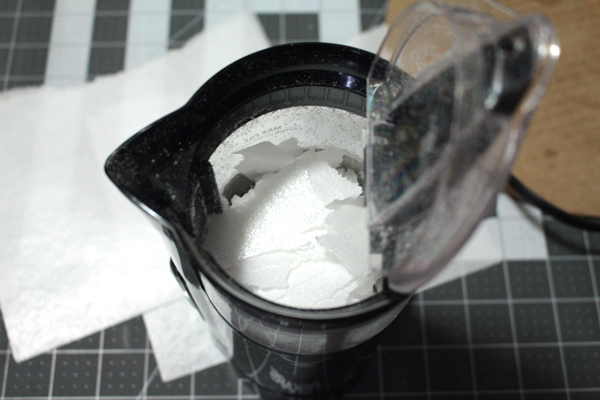
Rip up wafer paper and put it into the coffee grinder, you want to stuff it full so they don’t just fly all-around when you turn it on. Pulsing the grinder also helps break up the larger chunks.
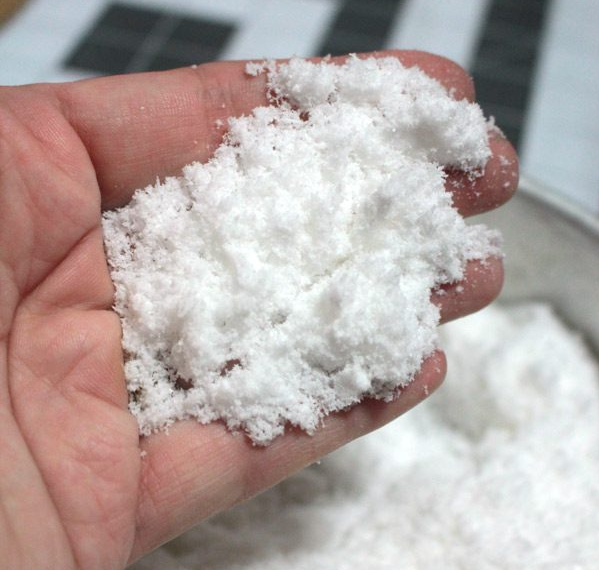
Easy peasy light and fluffy snow!! Images courtesy of the lovely Kara Andretta from Kara’s Couture Cakes!
Last modified on January 6th, 2023


I'm Avalon -- and I'm not your typical cake decorator. I'm obsessed with fusing the world of ART and CAKE. Sugar is my canvas. If you're down to get messy and dive into a whole new level of cake, take my virtual hand, cause I've got so many secrets I want to show you! learn more>>

Join 1000s of others in our Online Cake School and learn how to make incredible sugar art!


