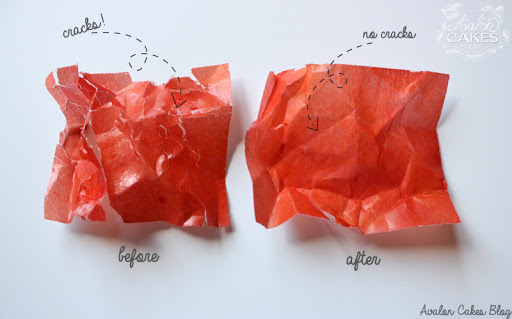
Scenario: You're pumped! You're getting ready to make your first wafer paper flower, you reach into that bag, pull that paper out, and "CRACK!" Your heart sinks to your stomach, you get all dizzy, curl up in the fetal position, cry......what, just me? 😉 hehe
So WHY is my wafer paper cracking?! How do I fix dry wafer paper?! WHY is what everyone else is saying is "so easy" for them, so hard for me?!
Have you ever been so excited to share something that you're literally doing the happy dance.. as you're typing this "something"? Welp, that is what I'm doing right now. It's hard to dance and type, for the record. I live in Colorado. Not only do I live in Colorado, but I live at 10,000 ft... what does that mean? SUPER DRY climate. (and other things, like baking problems, but that's a whole other blog post). The first time I experimented with wafer paper, I was ready to fold and curl and straight-up ORIGAMI. Well, that excitement soon ended, as it crumbled in my hands *insert frantic crying*. I tried what a few others had suggested, like shortening and oil, and neither cured my cracking wafer paper problem. Conclusion must be a bad batch, order more. Then my friend Stevi Fransen-Auble (wafer paper guru!) came to Denver to shoot a Craftsy class and was explaining this same predicament. The wafer paper she used every day in San Diego, without a problem, was brittle and cracking. Humid places, like San Diego, no problems. Dry places like, Denver, problems. *light bulb* My wafer paper needs a new environment!
My solution? Ever put a piece of moist bread into a bag of dry brown sugar lumps? Leave it, come back and the lumps are moist and good to go? You are giving the sugar something to pull moisture from... an environment. SO, let's create an environment for our wafer paper to pull moisture from! Ok, enough jibber-jabber.. here is how I did it...
Side note: Did you know colored wafer paper drys out even faster? The alcohol and dyes suck the life out of your wafer paper... WAIT, before you go to "frown town"... the solution...(drum roll please) how to fix dry and cracking wafer paper..
First, lay your wafer paper flat, not touching each other.
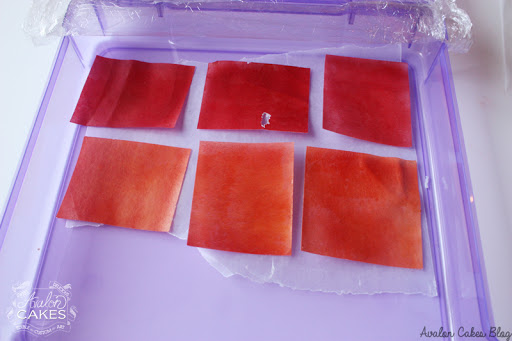
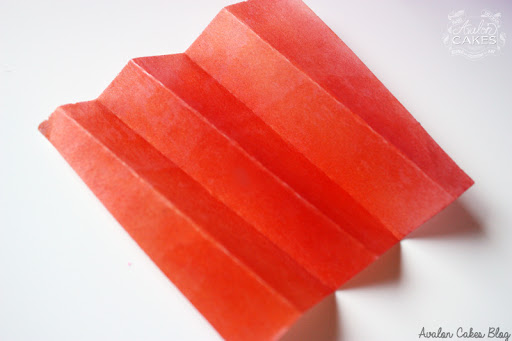
Note: It does not have to be in small pieces as shown above, I just had this lying around, you can use full sheets!
Stack up layers, putting a separator (wax paper, parchment or paper towel) between each layer. I've done about to 10 layers without a problem. I wouldn't go past 20 layers. I've recently experimented further with this and found that I could put the entire stack of wafer (25 sheets) into the container at once. I had nothing in between the sheets and I had no problems. As long as the water itself does NOT touch the wafer, it should be fine! Woop woop, that just got a whole lot easier! *happy dance*
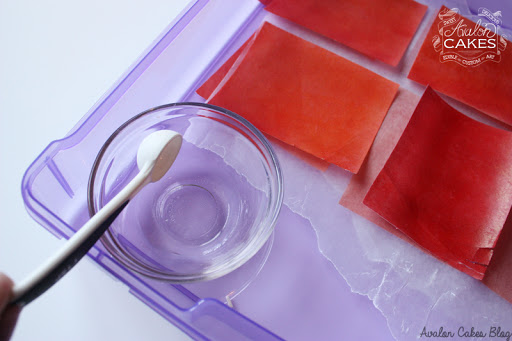
Put your shallow dish in the side of the box, add about a tablespoon of water.
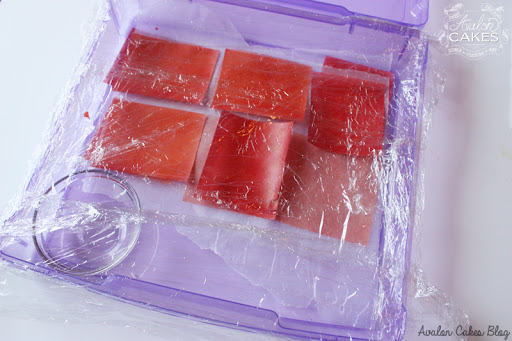
Place plastic wrap over the entire thing (this gives it an extra-strong seal, you don't want that water escaping your environment!) Close that box and let it sit for at least 24 hours. You can let it sit for up to a week.
Now, be sure to do this 24 hours prior to using the paper! Use it straight out of the box, and keep what you're not using at the moment, in the box. I have tried this technique, and then put them back into a plastic bag. Gone back to them weeks later and some of them cracked again (usually the airbrushed paper is the culprit). So best to prepare for what you need, and use it right away. If you don't use it all, you can of course, repeat this technique again at a later time on the same paper!
*Sigh of relief* back to my desired wafer paper projects... in ease!
Last modified on December 28th, 2022


I'm Avalon -- and I'm not your typical cake decorator. I'm obsessed with fusing the world of ART and CAKE. Sugar is my canvas. If you're down to get messy and dive into a whole new level of cake, take my virtual hand, cause I've got so many secrets I want to show you! learn more>>

Join 1000s of others in our Online Cake School and learn how to make incredible sugar art!


